Node RED
Create a new device and get certificates
Open the Settings menu in the Diologi chatbot and select New device (refer to the Connect Your Device section for detailed instructions). You will then be prompted to download a security certificate for your device.
Choose standard certificates, which are downloadable as three separate files:
- Client Certificate
- Client Private Key
- Server Certificate (CA)
Keep these certificates in a secure place, or better yet, remove them after establishing the connection between your device and Diologi.
Add MQTT to Flow
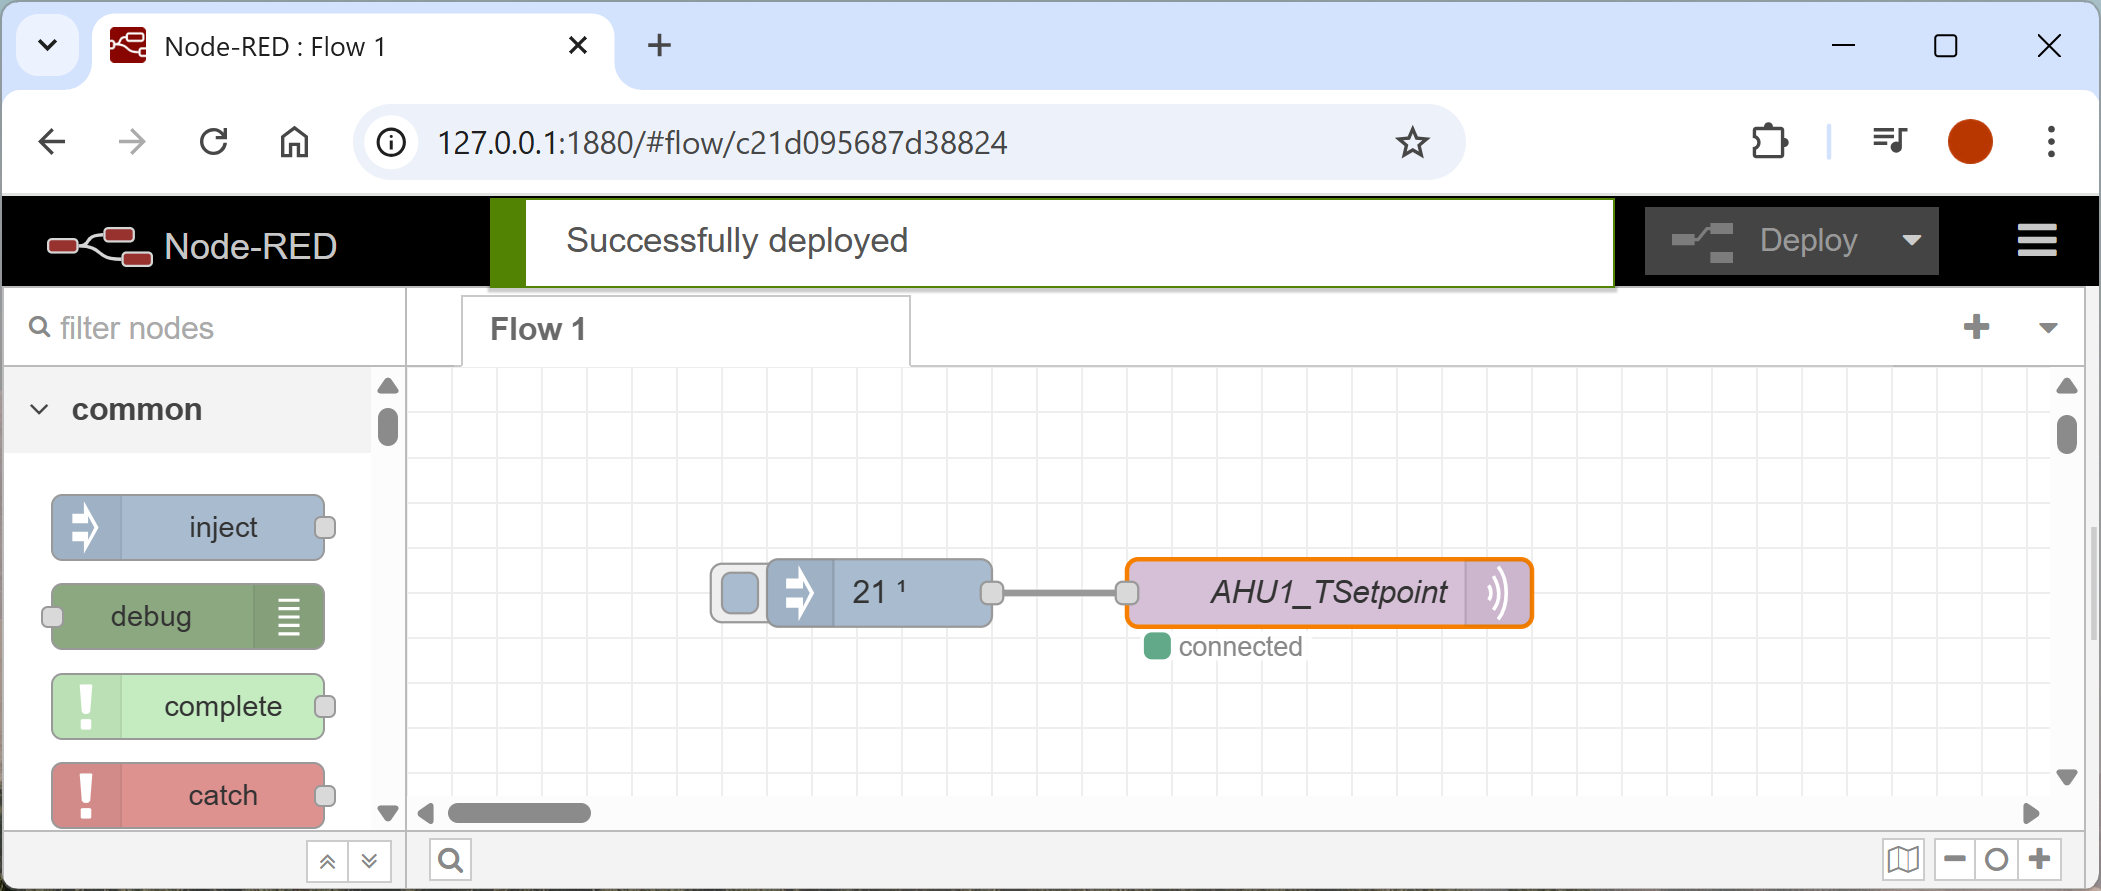
Open Node-RED flow and drag and drop mqtt out and inject nodes.
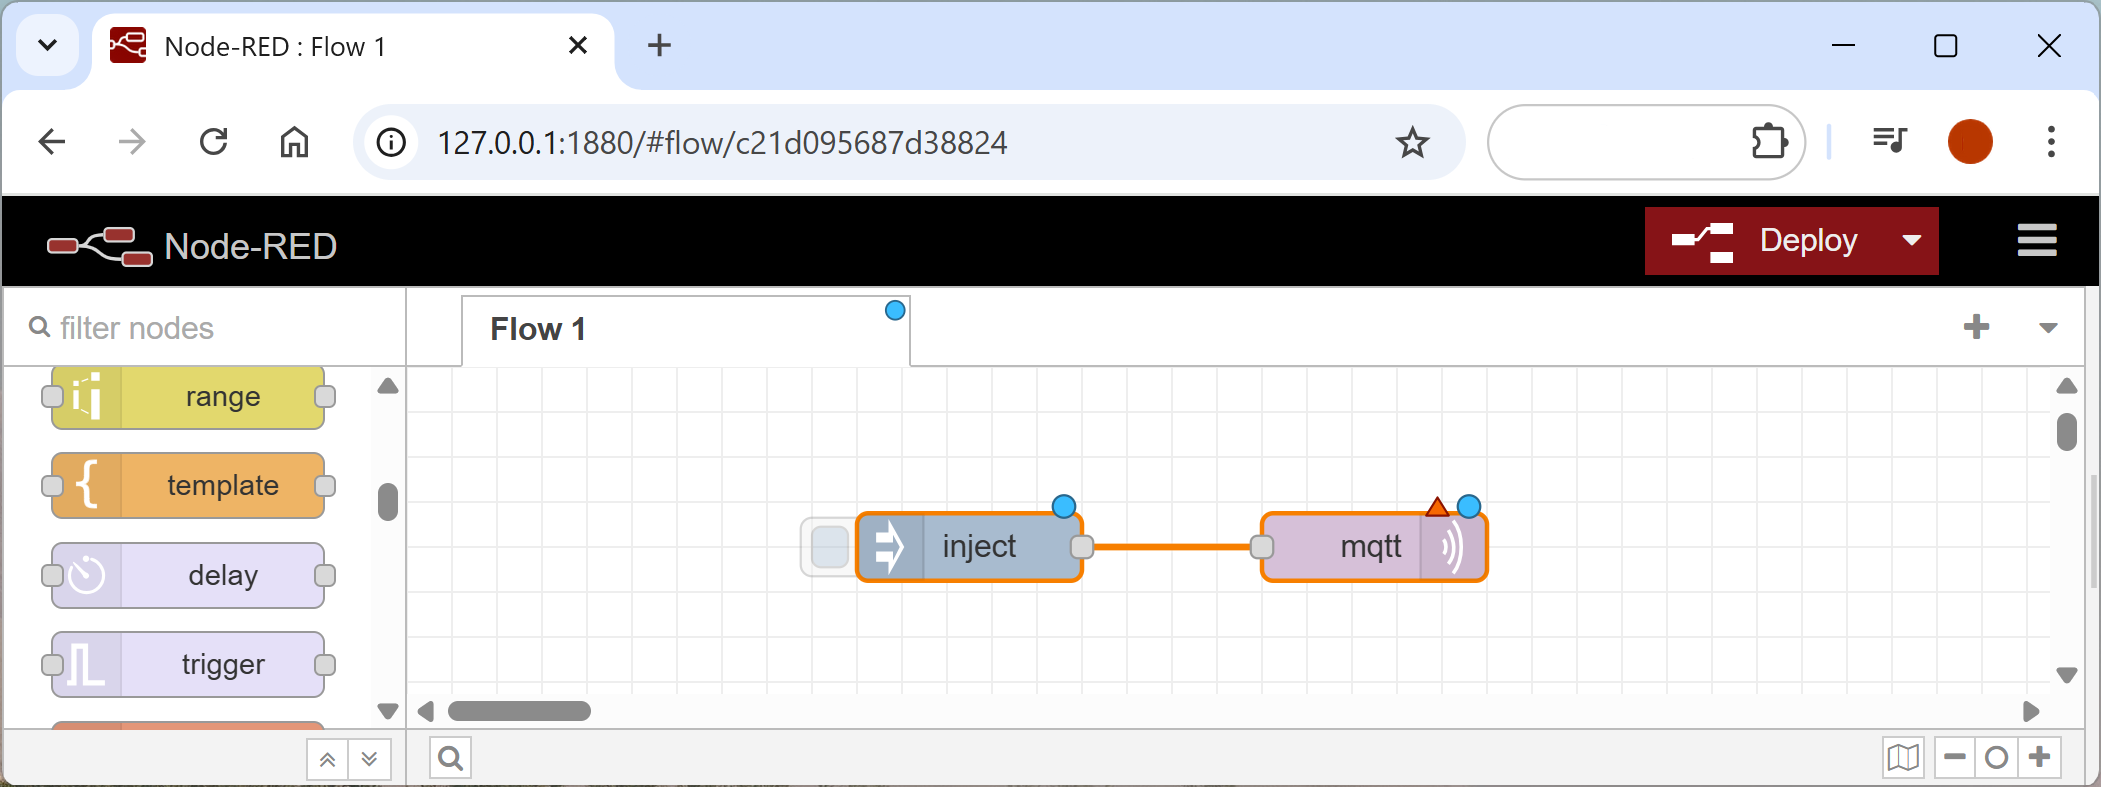
This guidance explains how to establish connection with Diologi bot using an mqtt out node for publishing data.
For subscription, add an mqtt in node with the same settings.
Set value to be published
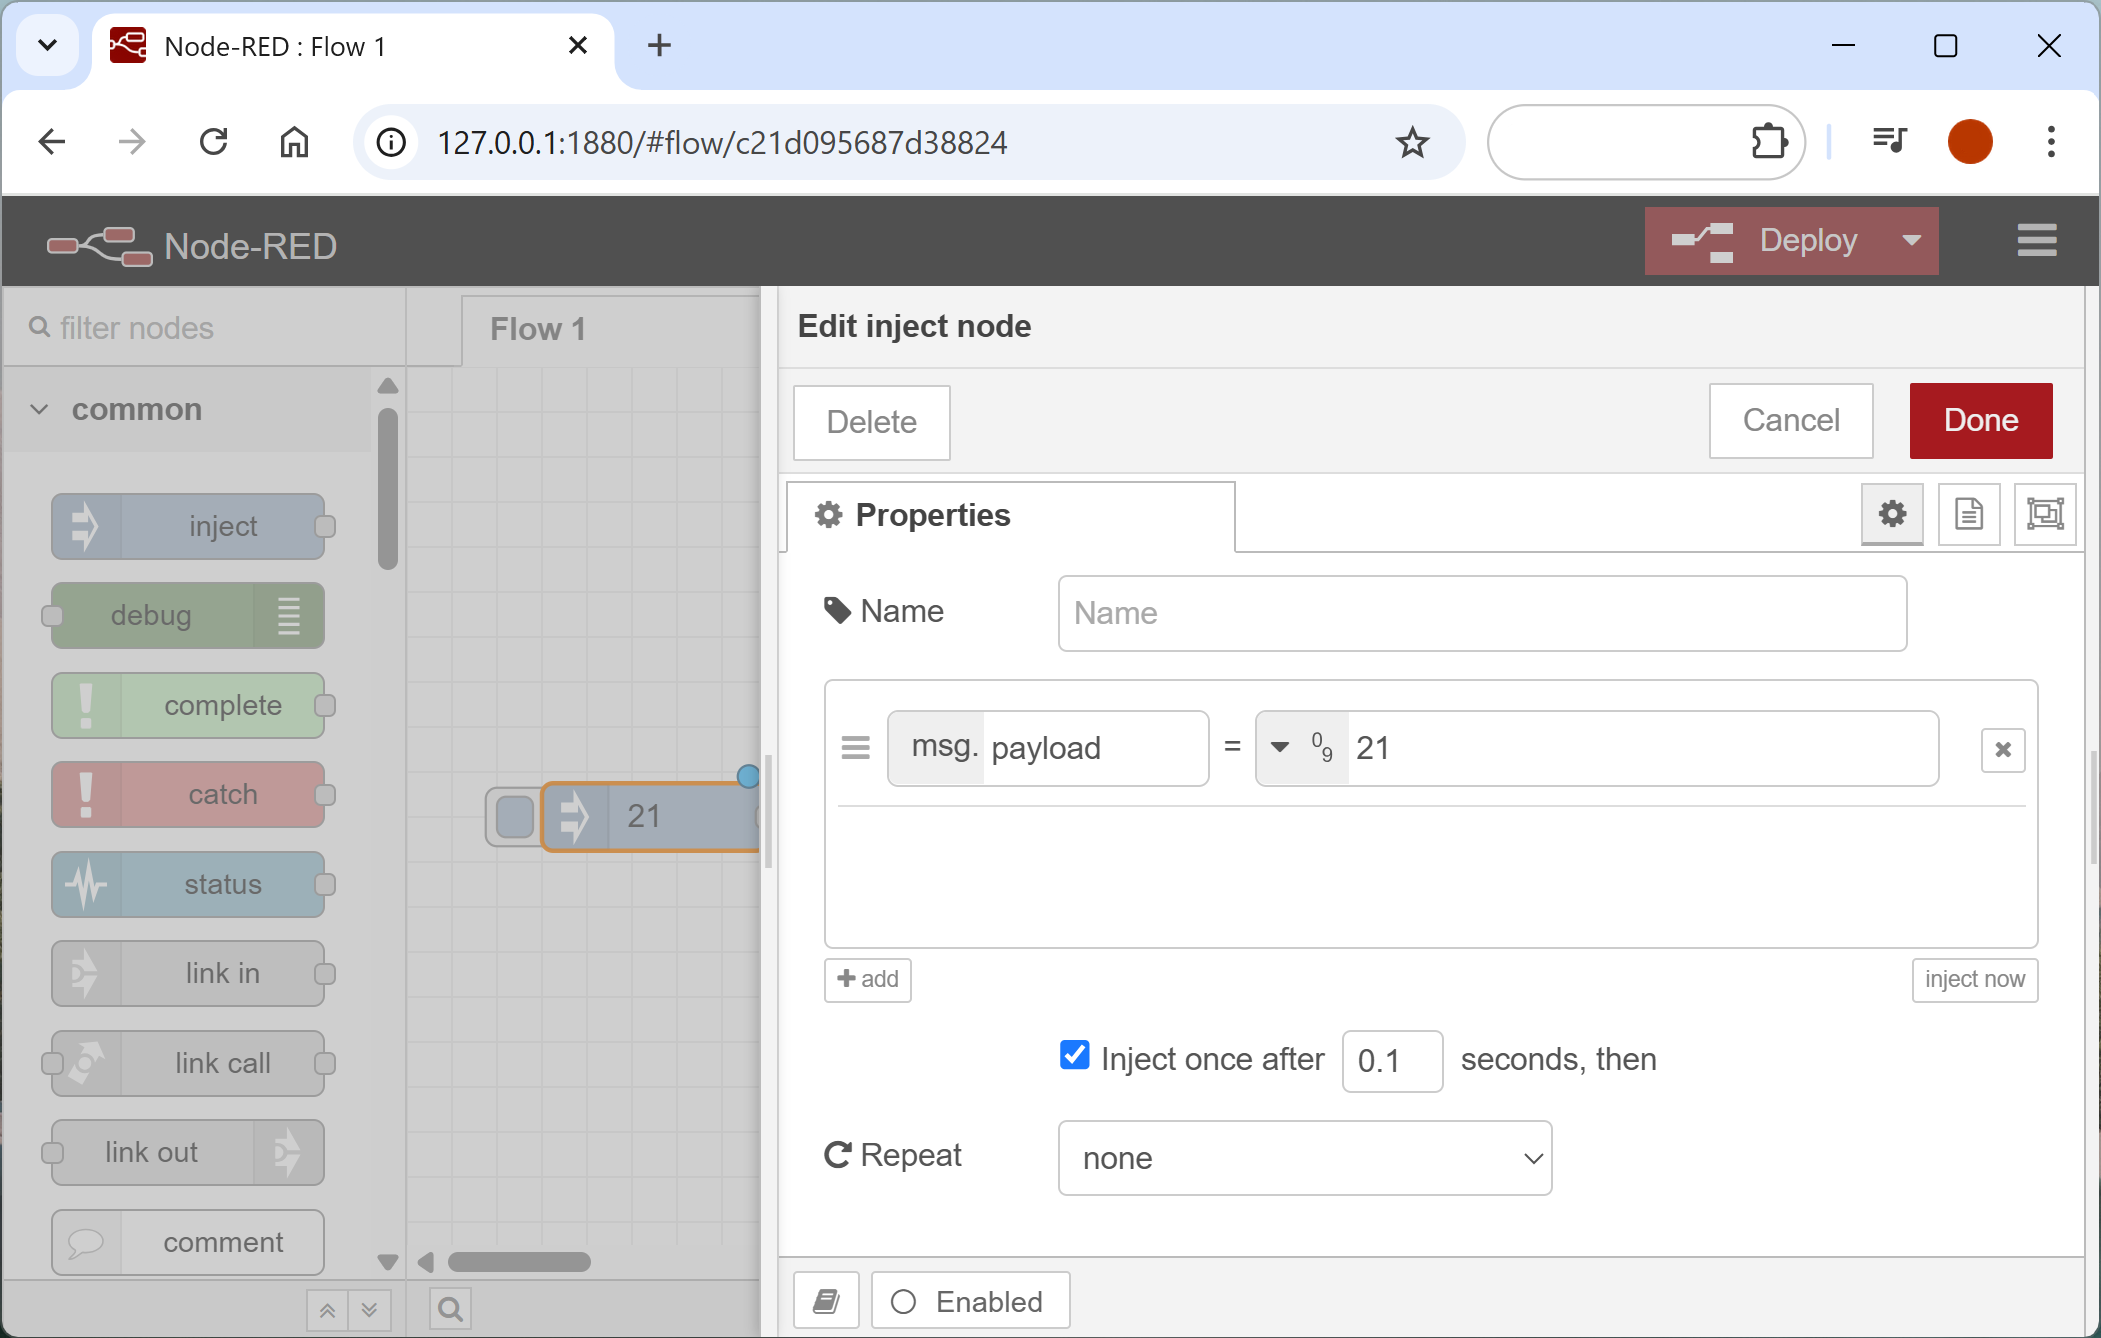
Double-click on the inject node, select number, string, or JSON for the value type and set the value you’d like to publish.
✅ Tick injects once after 0.1 seconds box to publish the value to the chatbot on deployment.
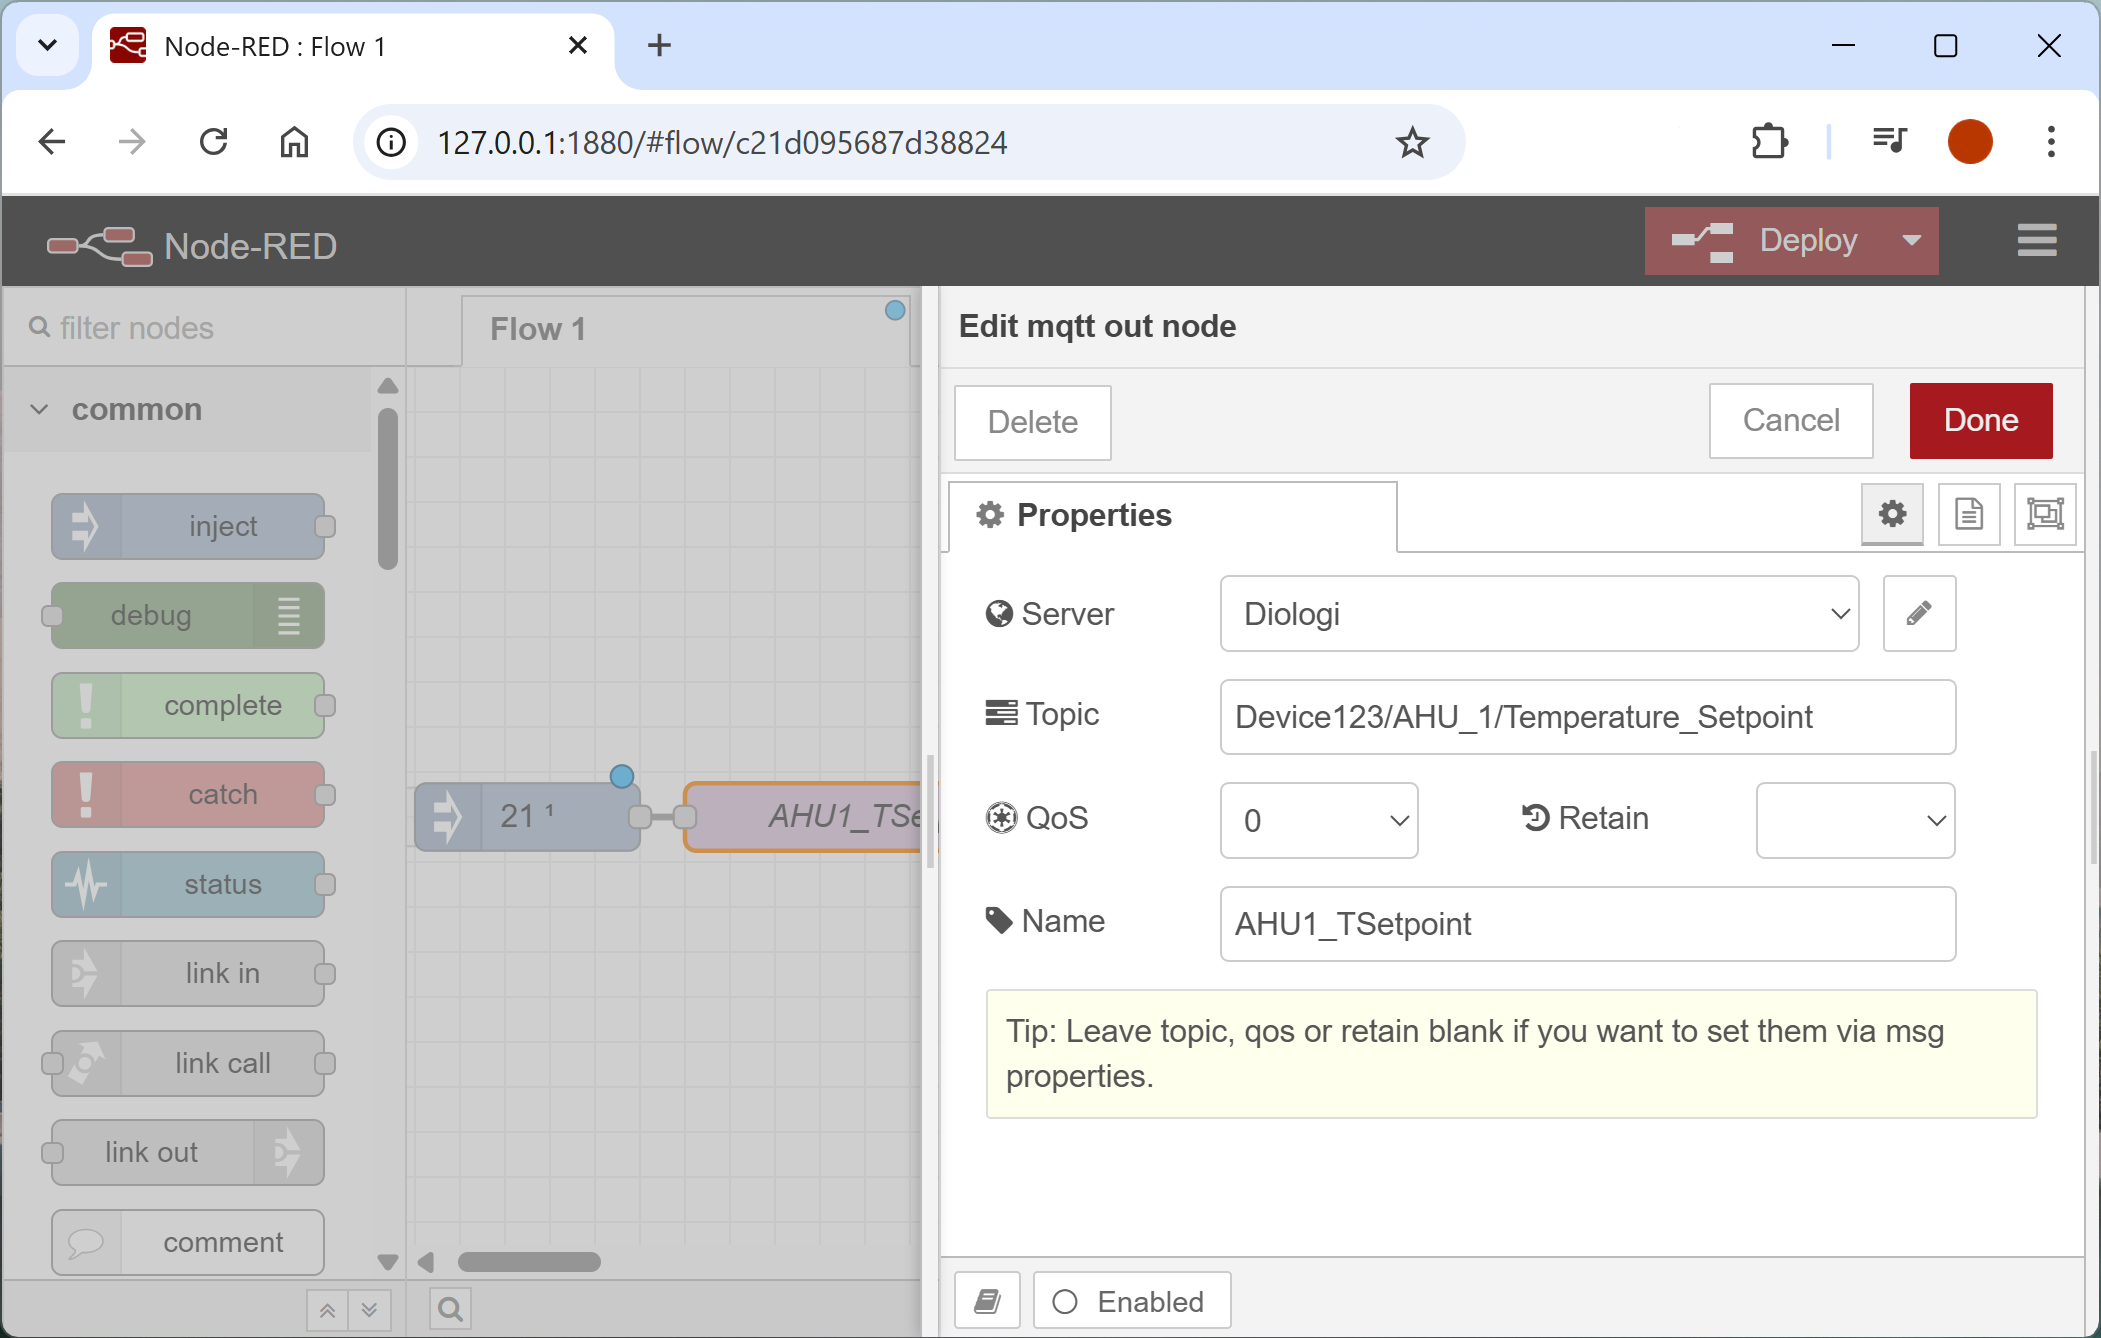
Configure MQTT Topic
Double-click on the mqtt out node and enter the topic starting with your device ID.
MQTT topics on your field device must exactly match the topics defined in the Excel file, including the device ID at the beginning.
The topic must not start or end with a slash (/). The slash should only be used to separate topic segments.
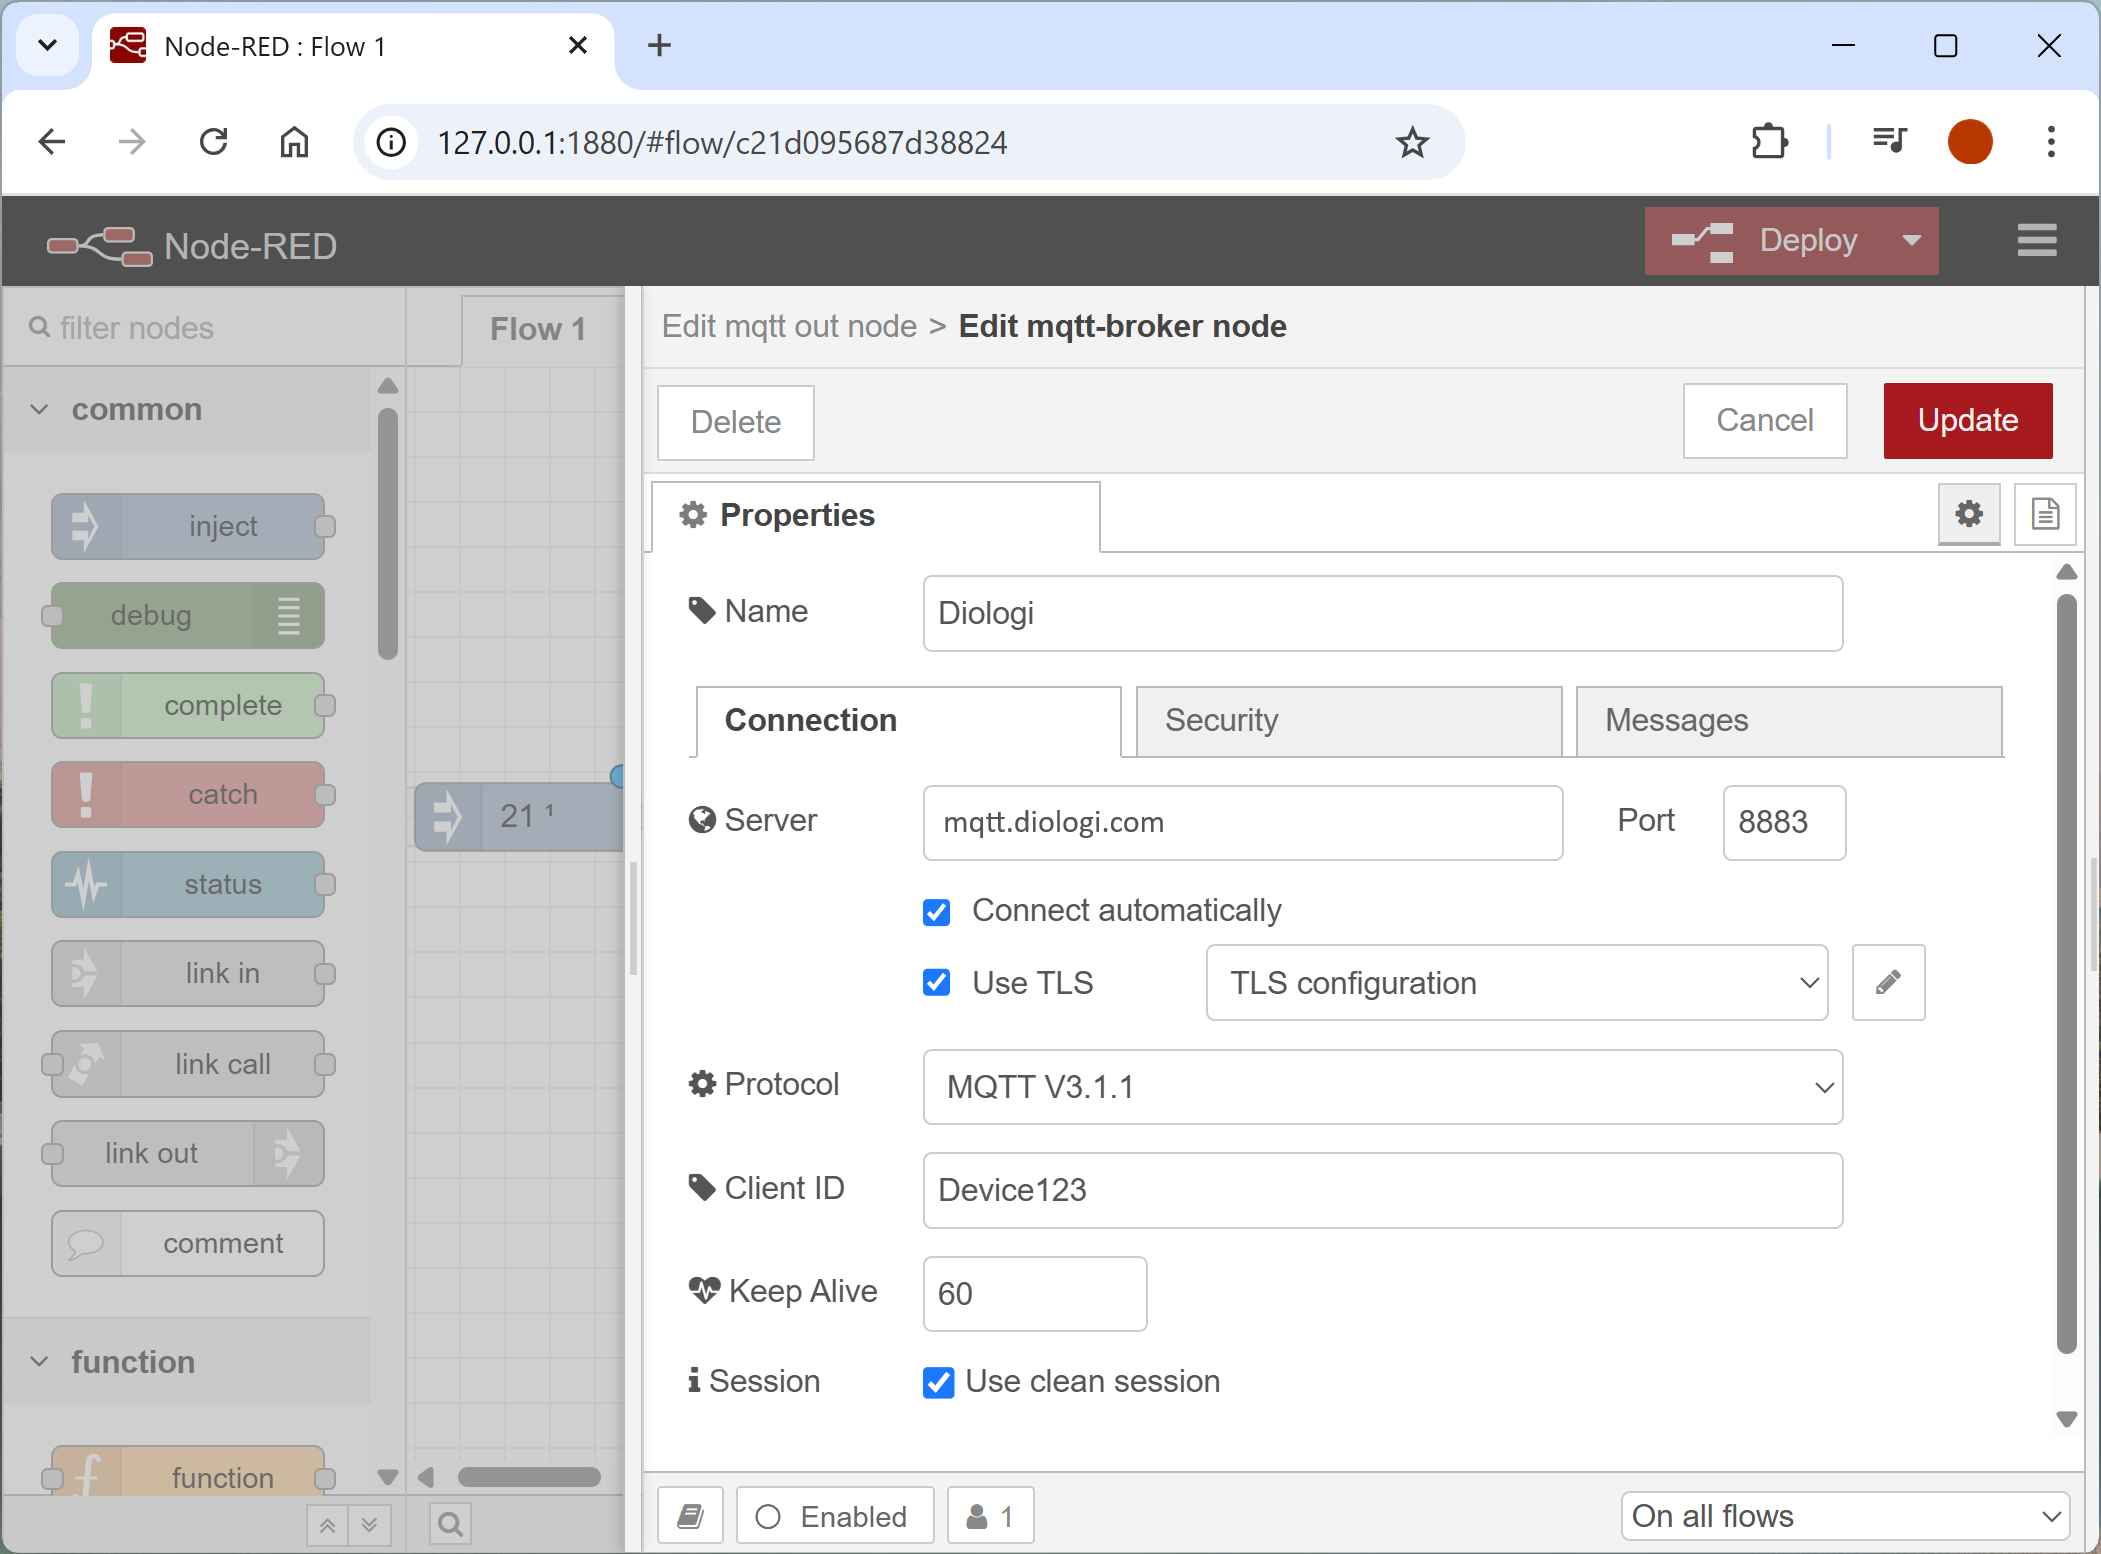
Configure connection settings
In the topic configuration window, click the pencil ✏️ icon next to "Server" to add a new broker.
Fill in the following:
Server:
mqtt.diologi.com
Port:
8883
Enter your Device ID in the MQTT Client ID field.
You can find the Device ID in the chatbot Settings selecting your device from the list.
Enable TLS: ✅ Tick this box.
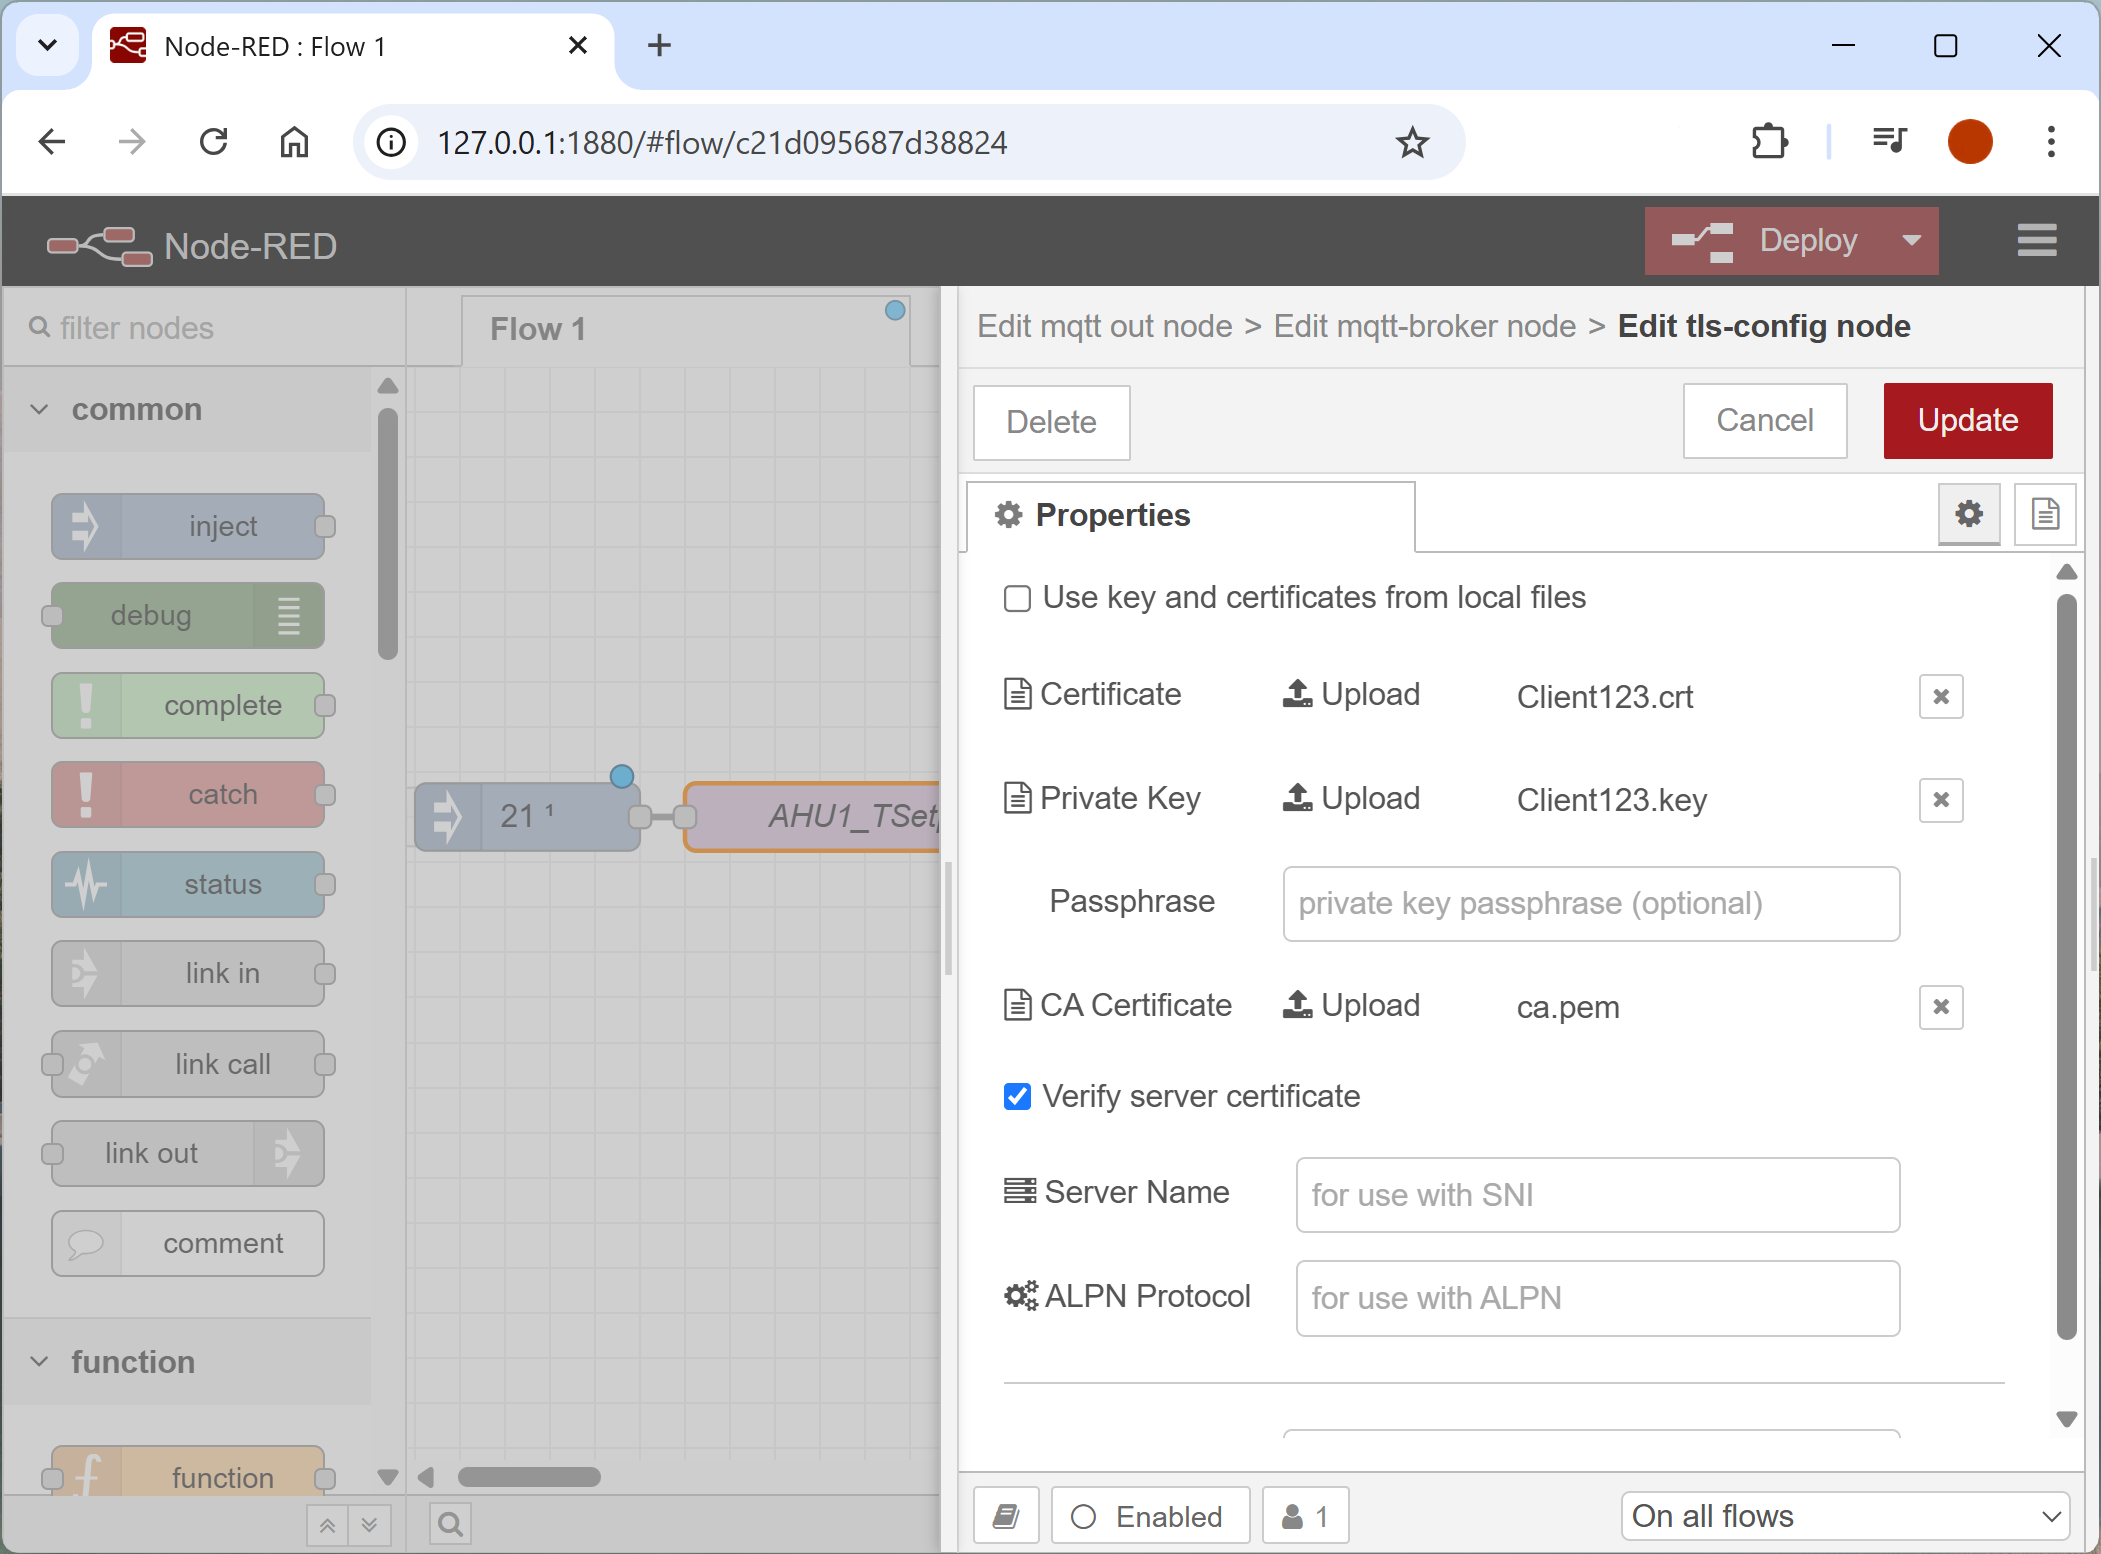
Upload the certificates
Click the TLS configuration section and upload the certificate files as follows:
- Client Certificate: The
.crtfile - Client Key: The
.keyfile - CA Certificate: The CA
.pemfile
Make sure "Verify server certificate" is checked ✅ (recommended).
Click Add to save the broker configuration and then Done.
Deploy and test
Click Deploy in the top-right corner of Node-RED.
Your value will be sent to the Diologi chatbot.
Check the chatbot for the point status to confirm the published value.