General MQTT
This section explains a general approach that can be adapted to most devices supporting MQTT with certificate-based authorization.
If this approach doesn’t work for your device, please let us know via @diologiSupport.
Create a new device and get certificates
Open the Settings menu in the Diologi chatbot and select New device (refer to the Connect Your Device section for detailed instructions). You will then be prompted to download a security certificate for your device.
Depending on your device type, choose either:
- Standard certificates: Downloadable as three separate files:
- Client Certificate
- Client Private Key
- Server Certificate (CA)
- Full-chain certificate: Downloadable as a single file containing the above certificates and private key.
For this tutorial, we will need the standard certificates pack.
Keep these certificates in a secure place, or better yet, remove them after establishing the connection between your device and Diologi.
Download MQTT Explorer
For this guide, we will use MQTT Explorer, a free MQTT client useful for testing and troubleshooting MQTT connections.
You can download the latest version from mqttexplorer.com.
Set up Connection Settings
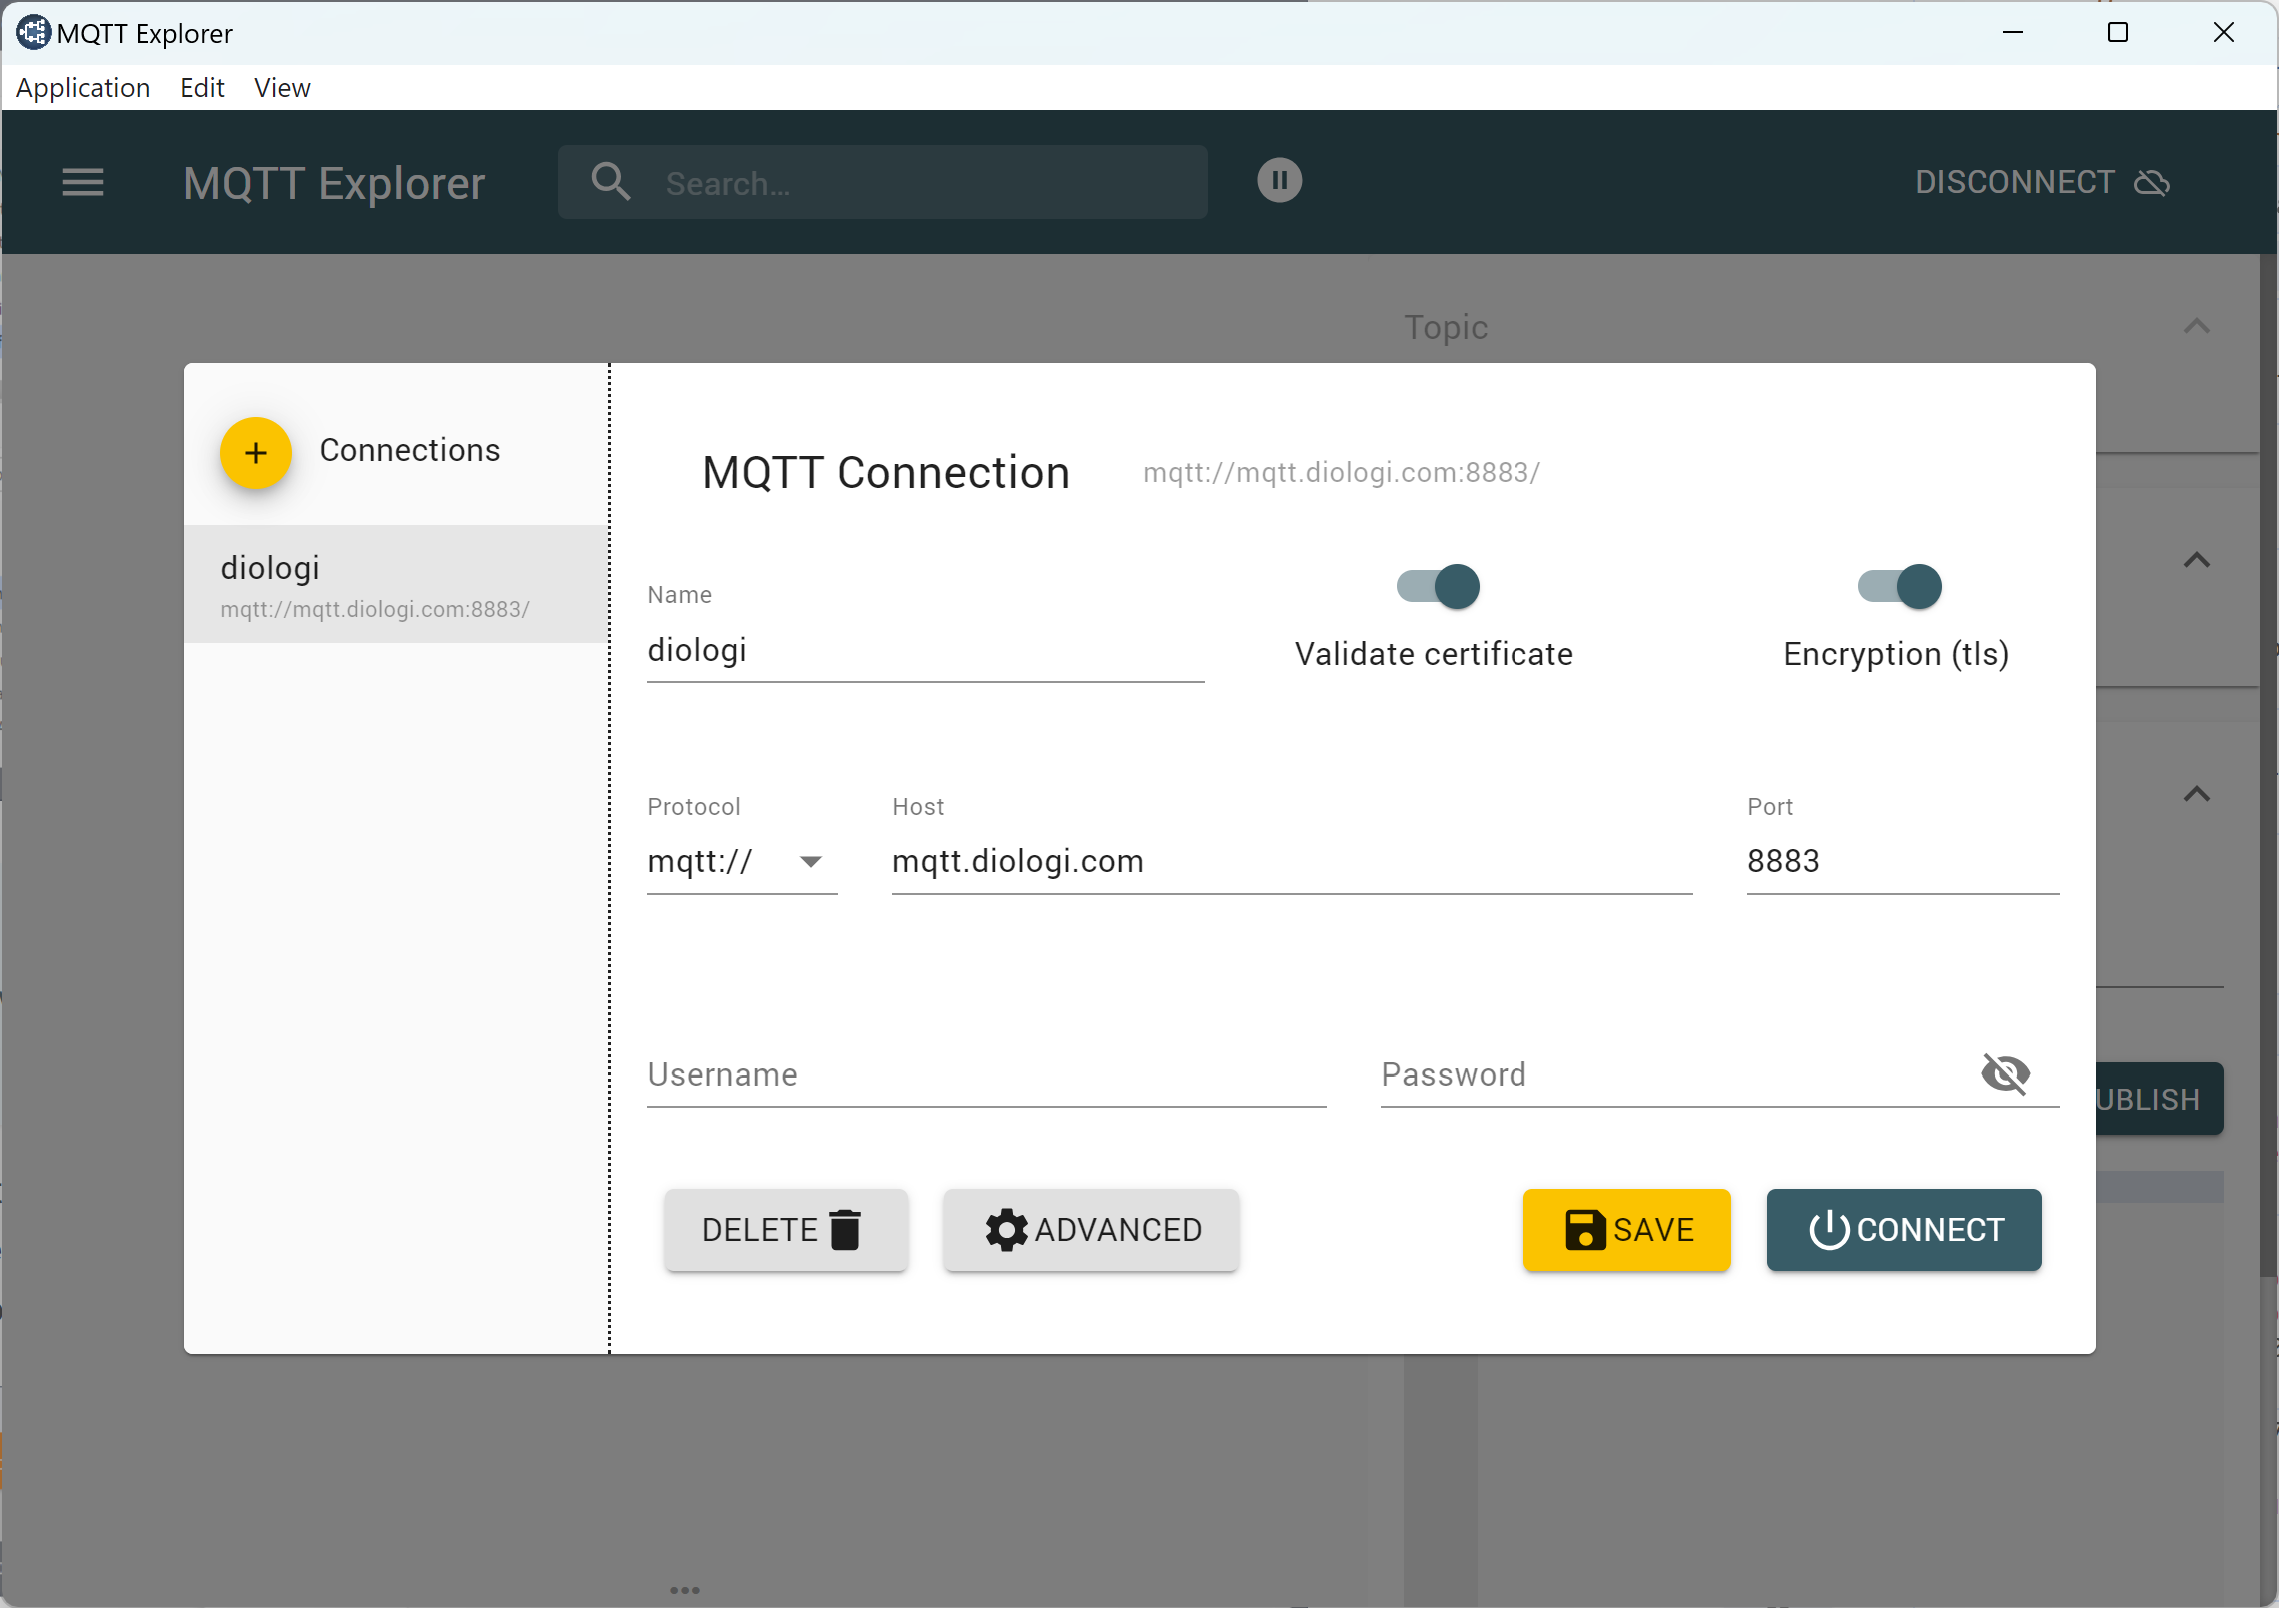
To add a new connection in MQTT Explorer, follow these steps:
-
Click the + button to create a new connection.
-
Give it a Name (e.g.,
diologi). -
Ensure that the Validate Certificate and Encryption (TLS) options are enabled.
-
Set the Protocol to
mqttand enter the Host:mqtt.diologi.com -
Enter the Port:
8883 -
Leave the Username and Password fields blank.
Upload the certificates to Device (MQTT Explorer)
- In the MQTT Connection window, click ADVANCED.
- In the window that opens, enter your Device ID in the MQTT Client ID field.
You can find the Device ID in the chatbot Settings selecting your device from the list.
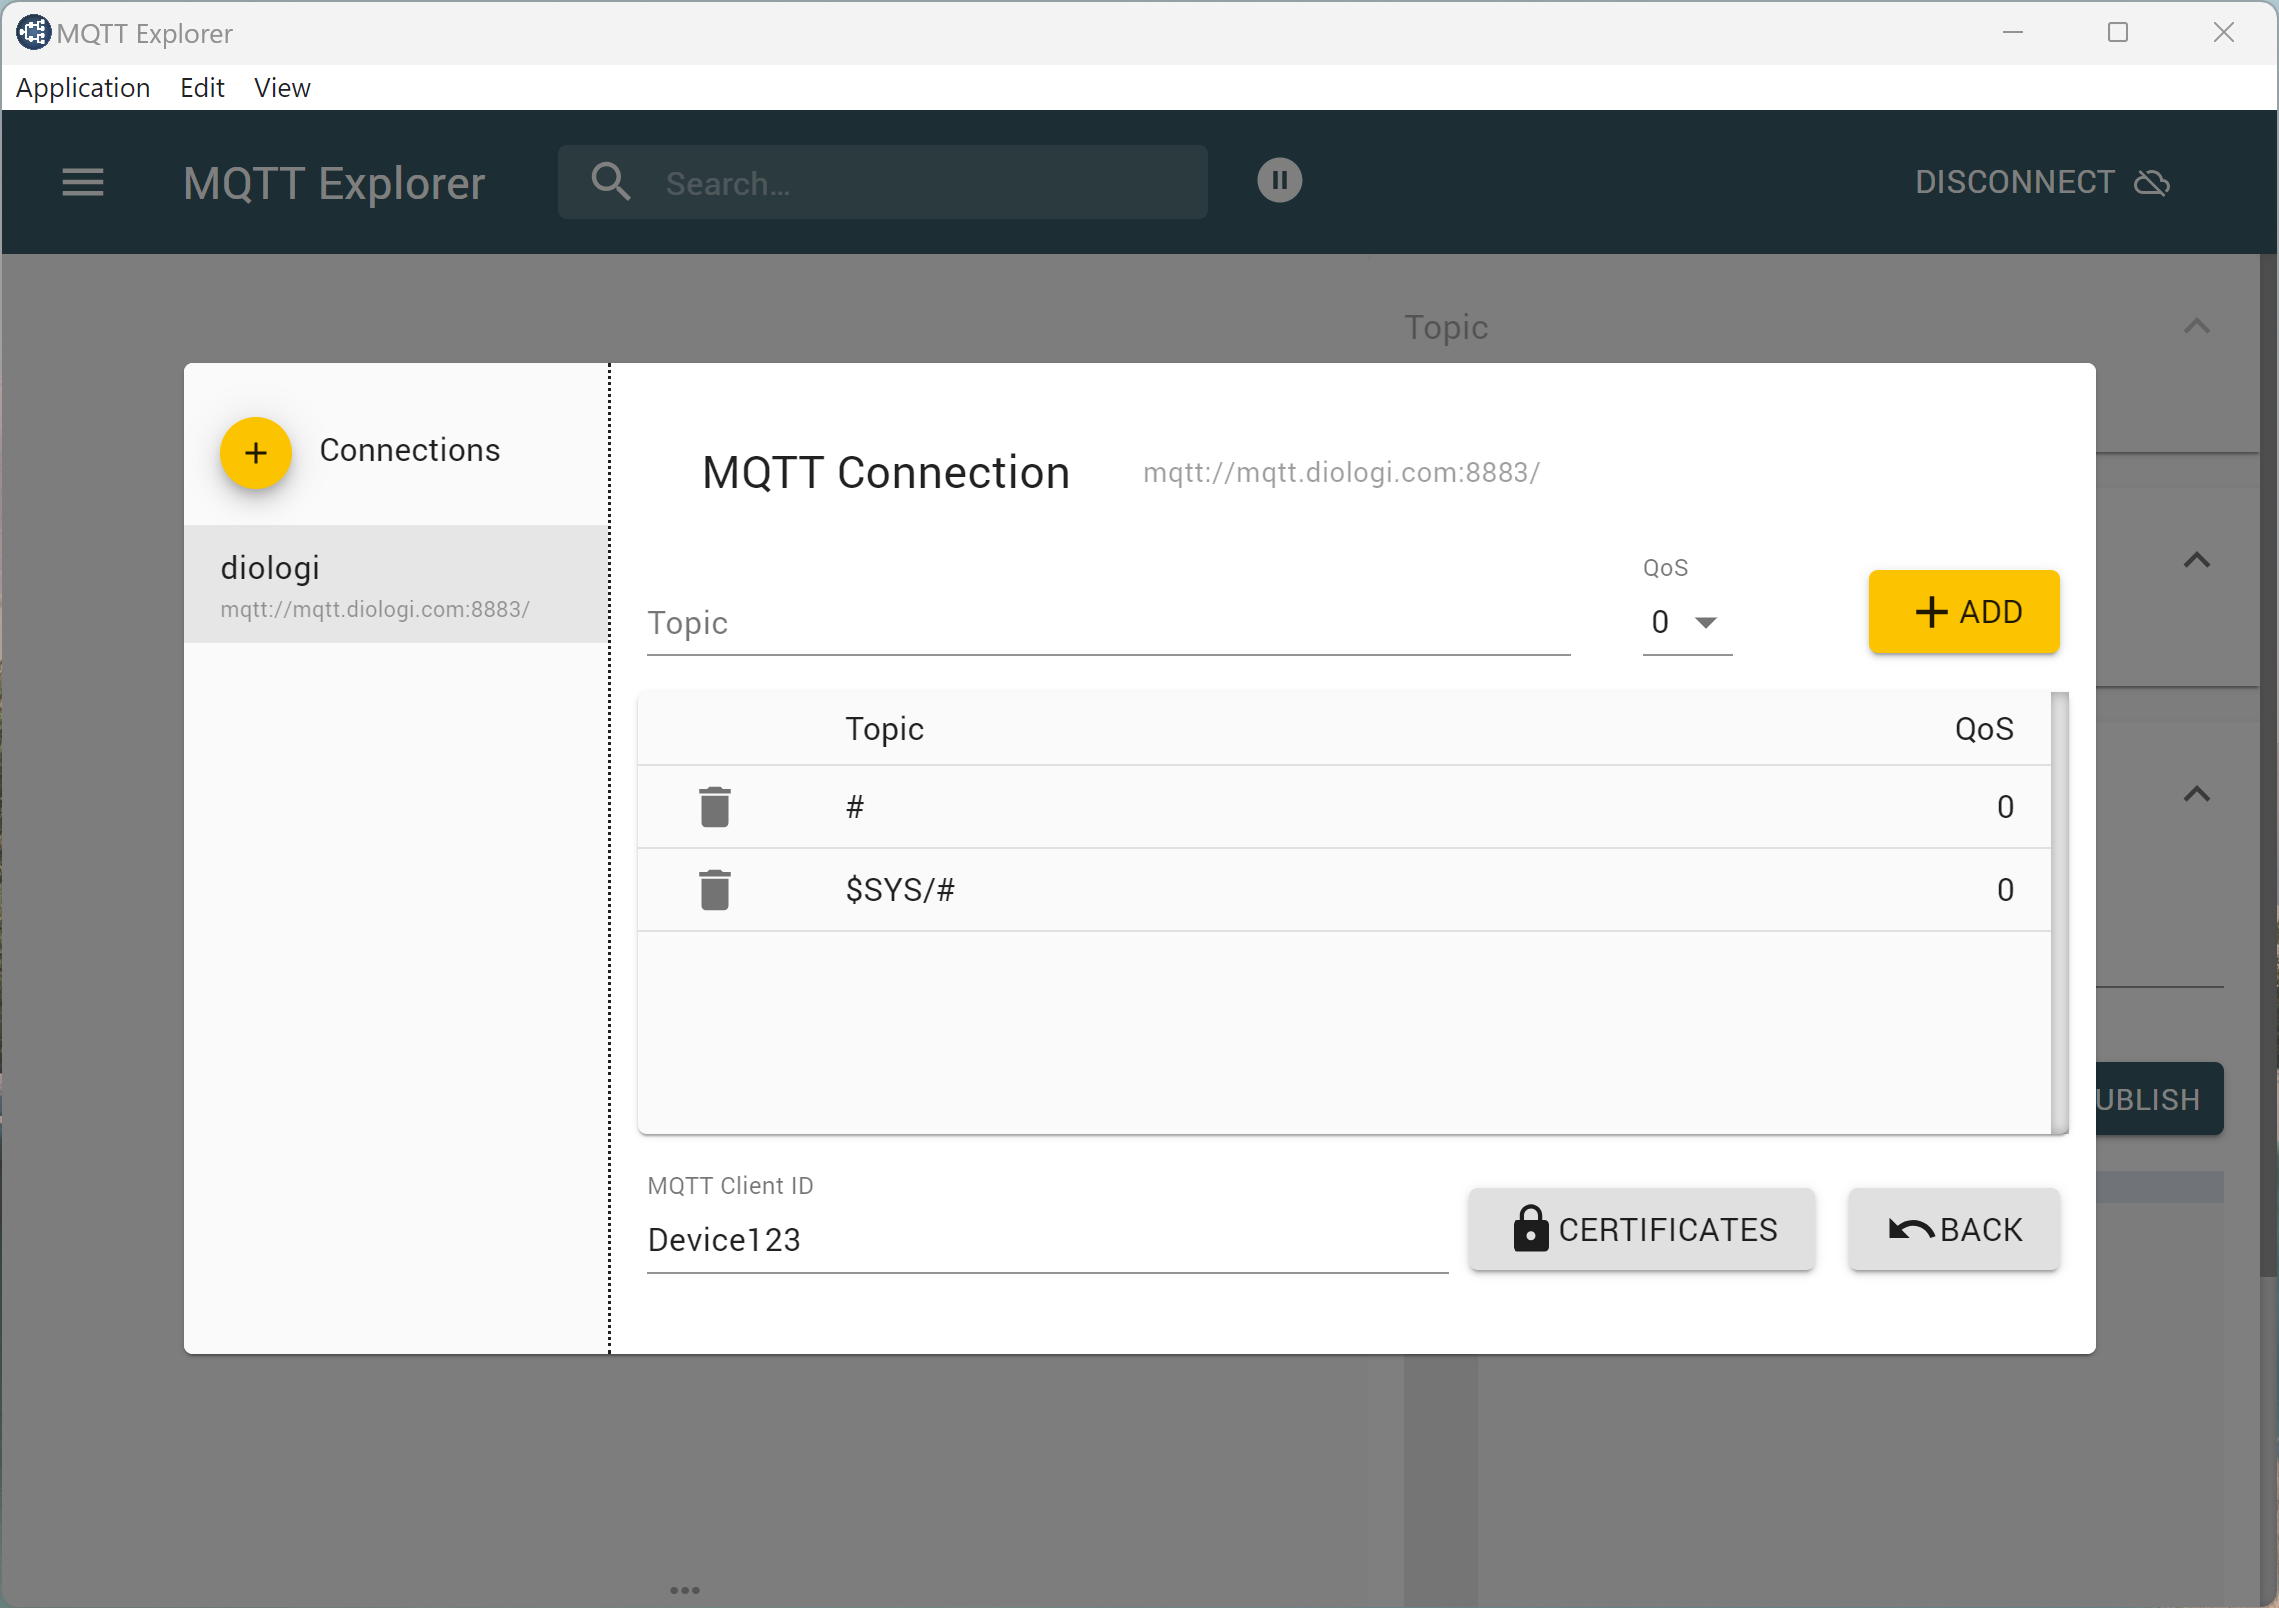
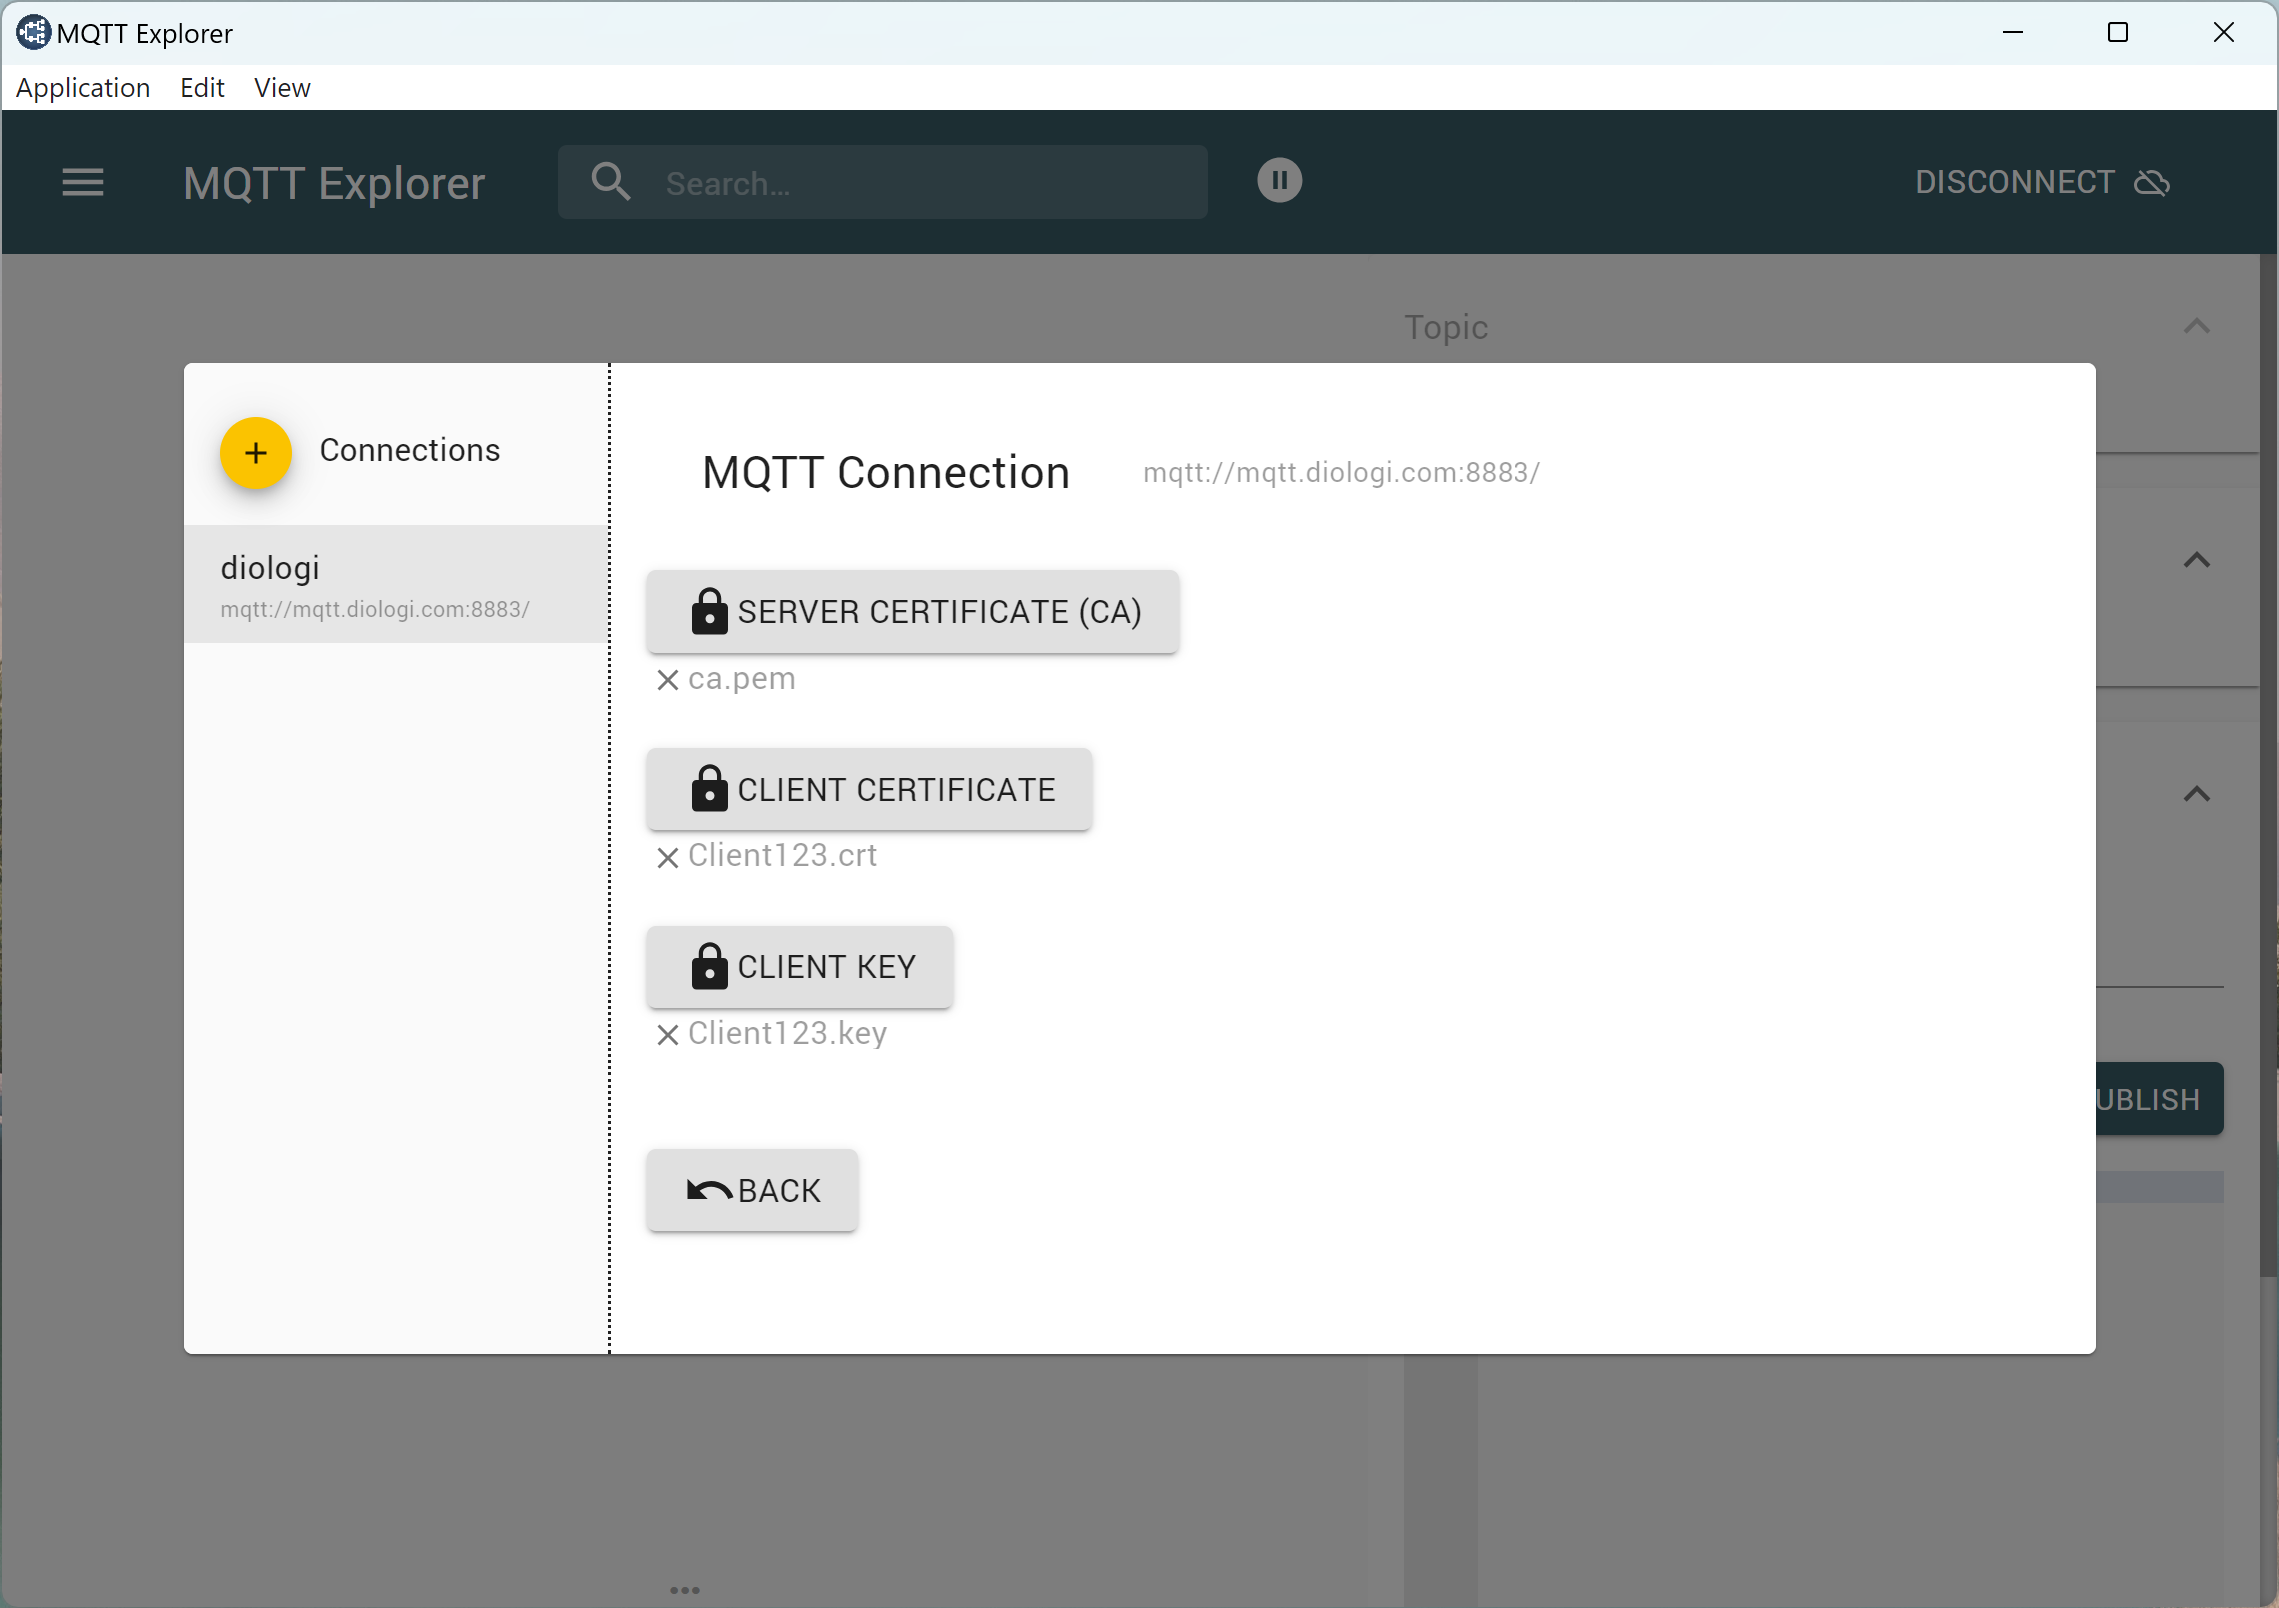
- Click on CERTIFICATES.
- Upload the Server Certificate (CA), Client Certificate, and Client Private Key that you downloaded from the chatbot in the first step.
- Click BACK until you return to the initial connection settings window.
Connect to the Diologi chatbot
In the first window with connection settings, click the CONNECT button.
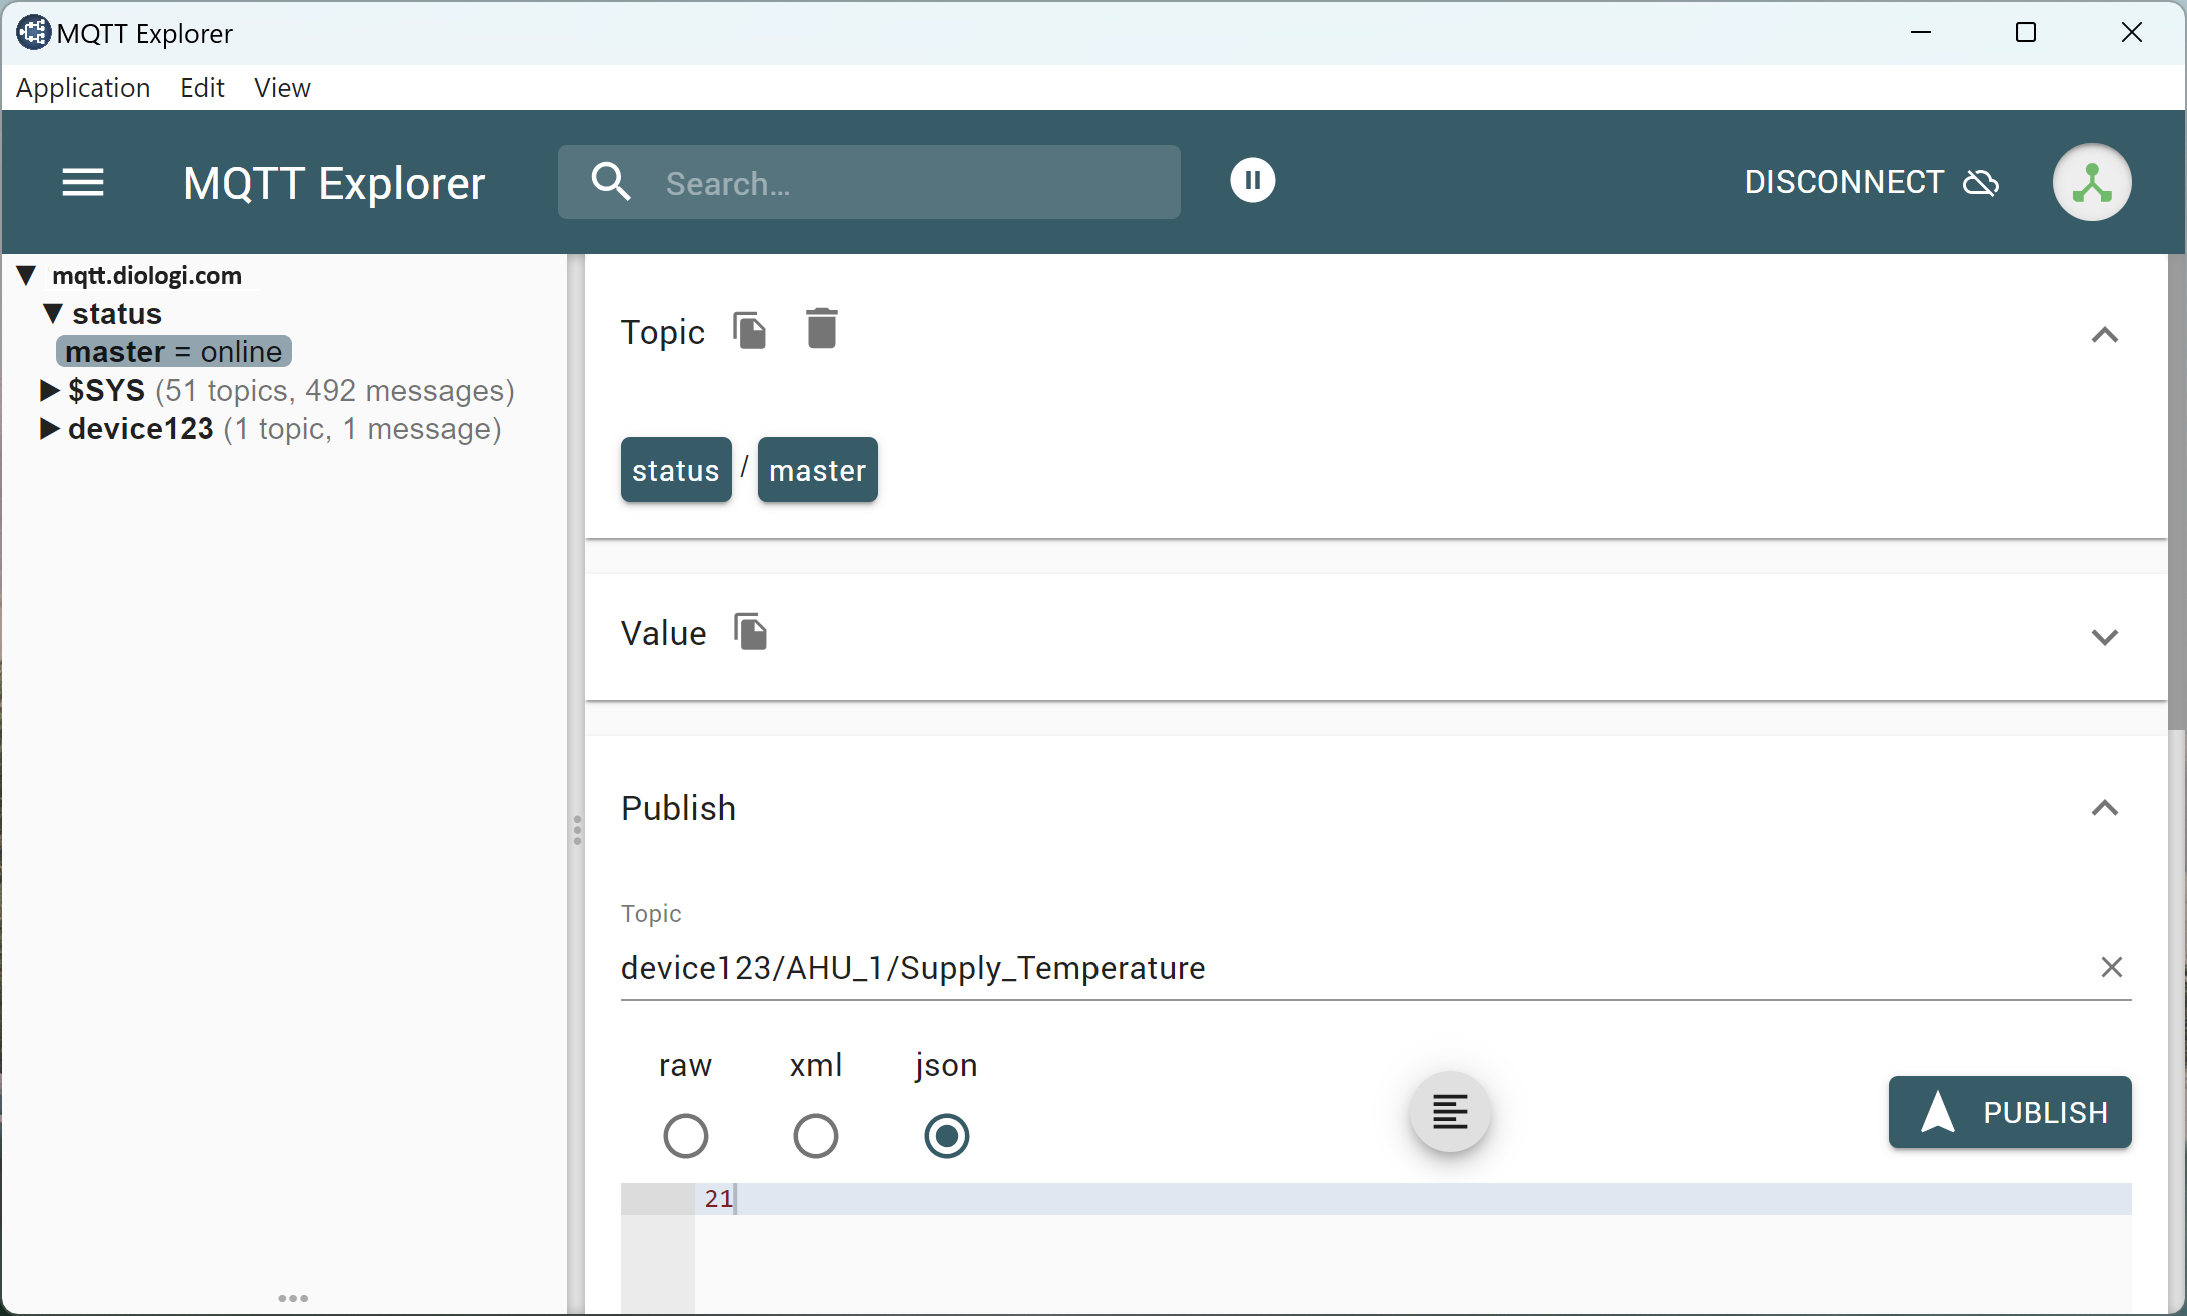
If everything is configured correctly, you should see the window below, showing master = online under Status in the left navigation sidebar.
If you don’t establish a connection, ensure that port 8883 is open on your PC or device and routers.
Communication
Once connected, you can test topics and exchange data between Diologi and MQTT Explorer.
Before performing publishing or subscribing requests from MQTT Eexplorer, make sure you have configured the points in the Diologi chatbot using the Points Configuration Template in Excel.
MQTT topics on your field device must exactly match the topics defined in the Excel file, including the device ID at the beginning.
Publishing Data:
- Enter the topic, starting with your device ID.
- Select
jsonas the format. - Enter the value you want to send with the topic and click the PUBLISH button.
The topic must not start or end with a slash (/). The slash should only be used to separate topic segments.
Subscribing to Topics:
- If currently connected, disconnect first.
- Click ADVANCED again in the MQTT Connection settings.
- In the window that opens, ADD the topics you wish to subscribe to.
- Connect again. The subscription topics will then be shown in the left sidebar.
For more detailed information, please refer to the MQTT Explorer Guide.