Diologi BACnet-MQTT Gateway
Use this guide when your field devices speak BACnet/IP and you want to connect them to the Diologi app through the Diologi BACnet-MQTT Gateway.
Diologi BACnet-MQTT Gateway is free distributed software that can be installed on Linux-based operating systems and is available as an image for Raspberry Pi (recommended). Request installation files and setup guidance at support@diologi.com.
Before starting this guide, create a gateway device in the Diologi app and issue MQTT certificates for it. If needed, follow Quick Start Guide.
Step 1. Connect to the gateway
Open a browser and navigate to the gateway web interface using the default address:
http://192.168.0.241:8000
Log in with the default credentials:
| Field | Default value |
|---|---|
| Username | admin |
| Password | admin01 |
If the gateway is on a different subnet, connect a laptop directly to the gateway's LAN port and assign your laptop a static IP in the 192.168.0.x range (for example, 192.168.0.10) to reach the default address.
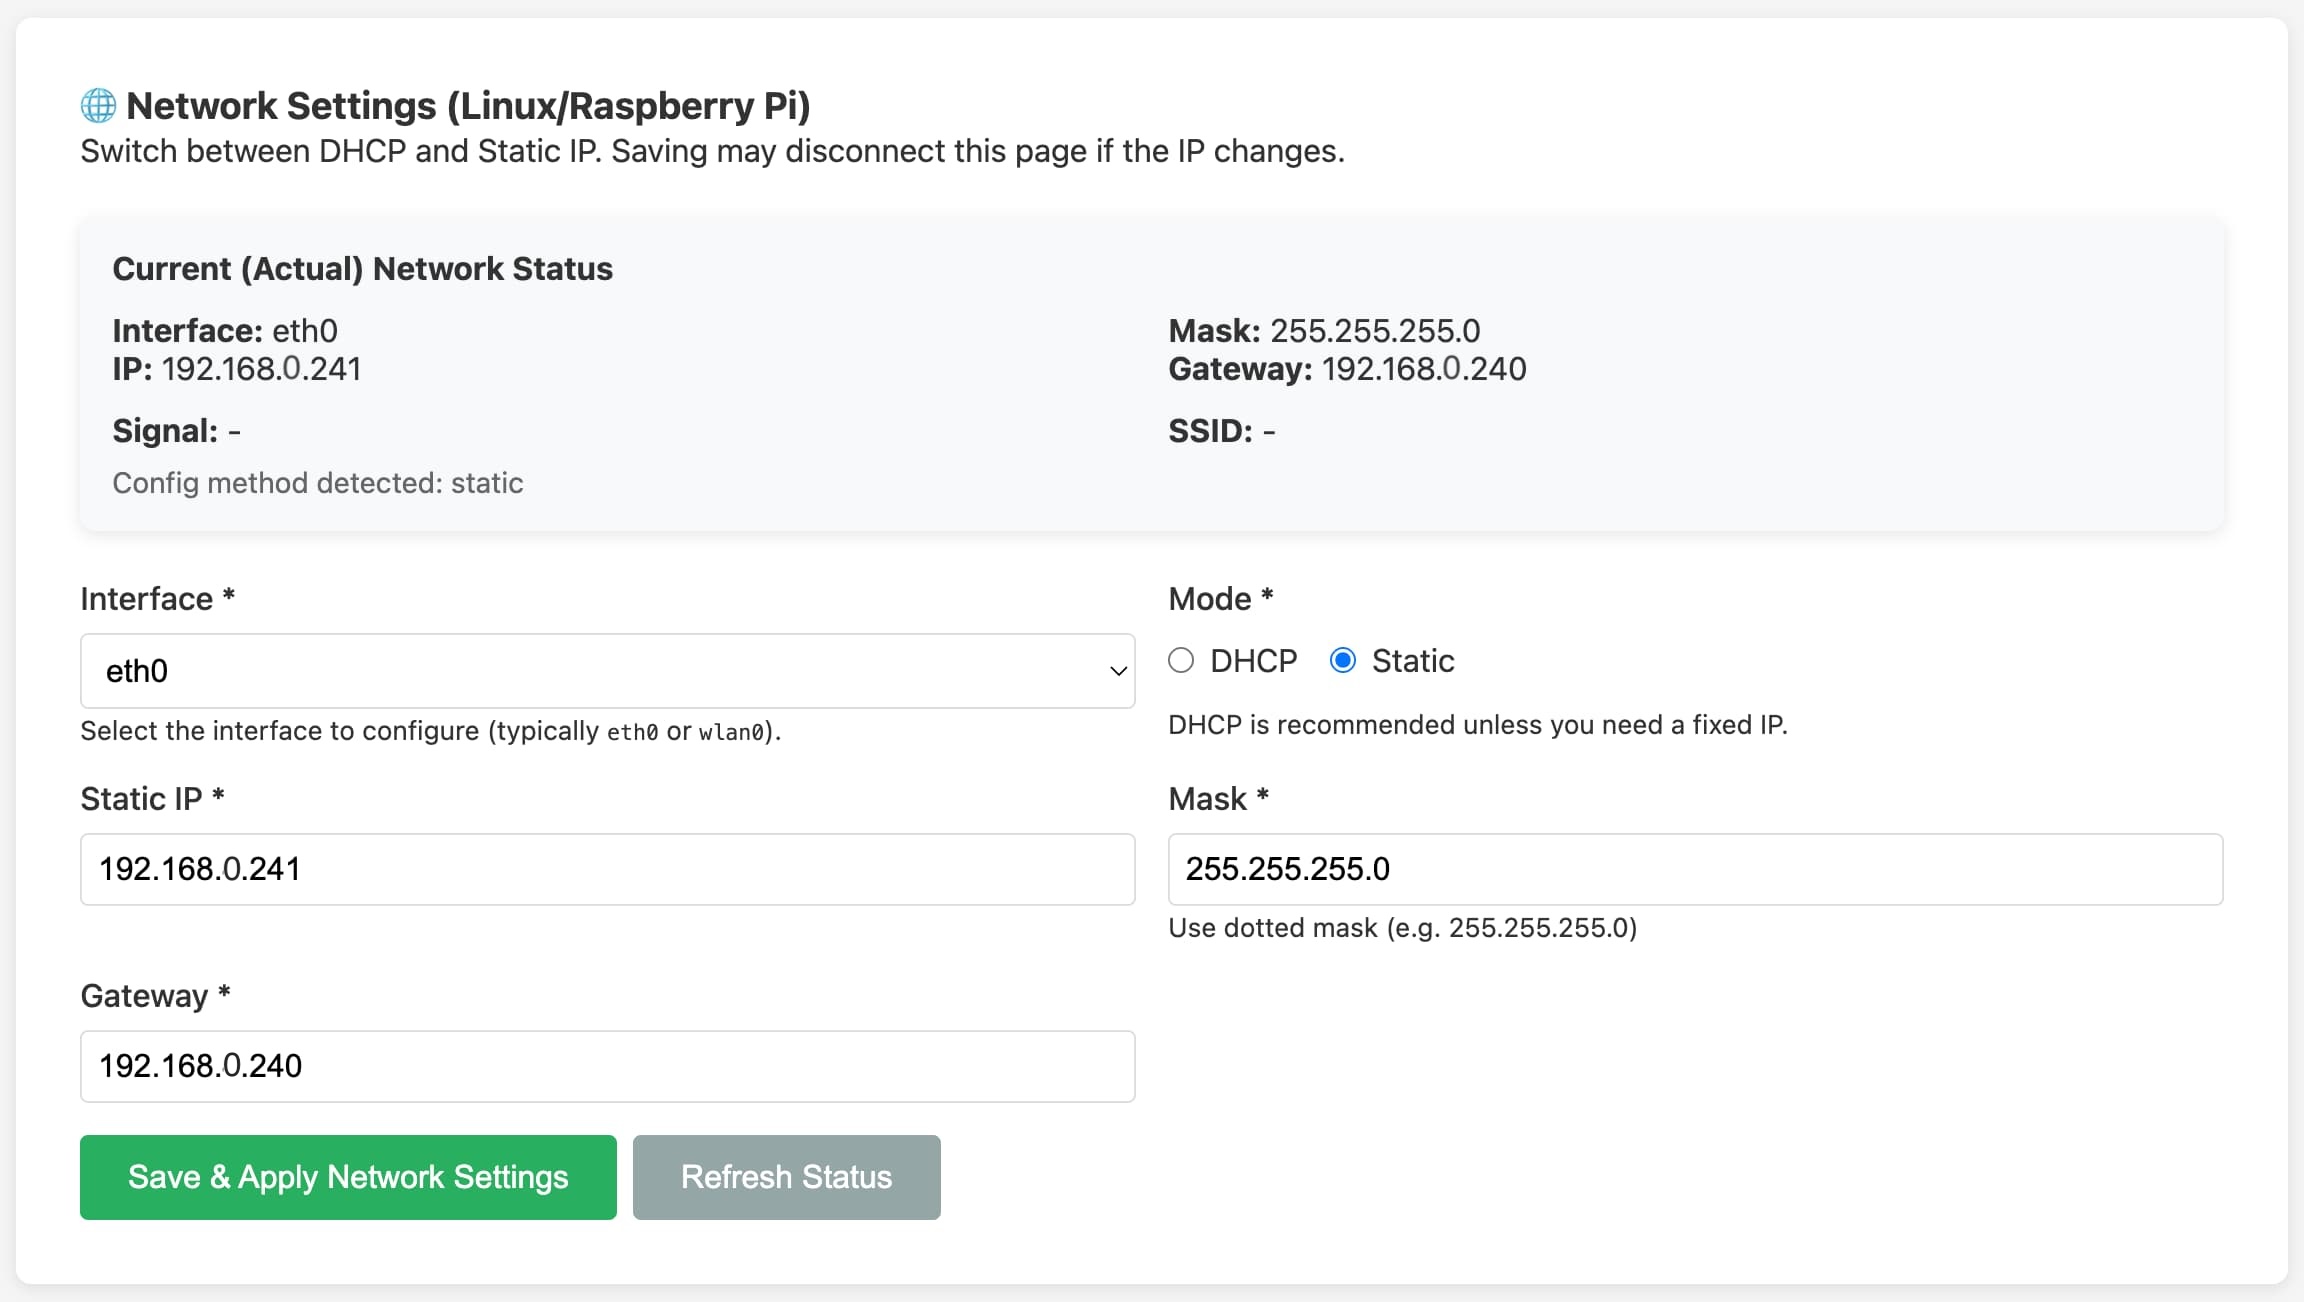
Step 2. Configure network and BACnet gateway settings
Go to Settings and configure:
-
Network Settings (DHCP or Static)
-
Wi-Fi Settings (if applicable)
-
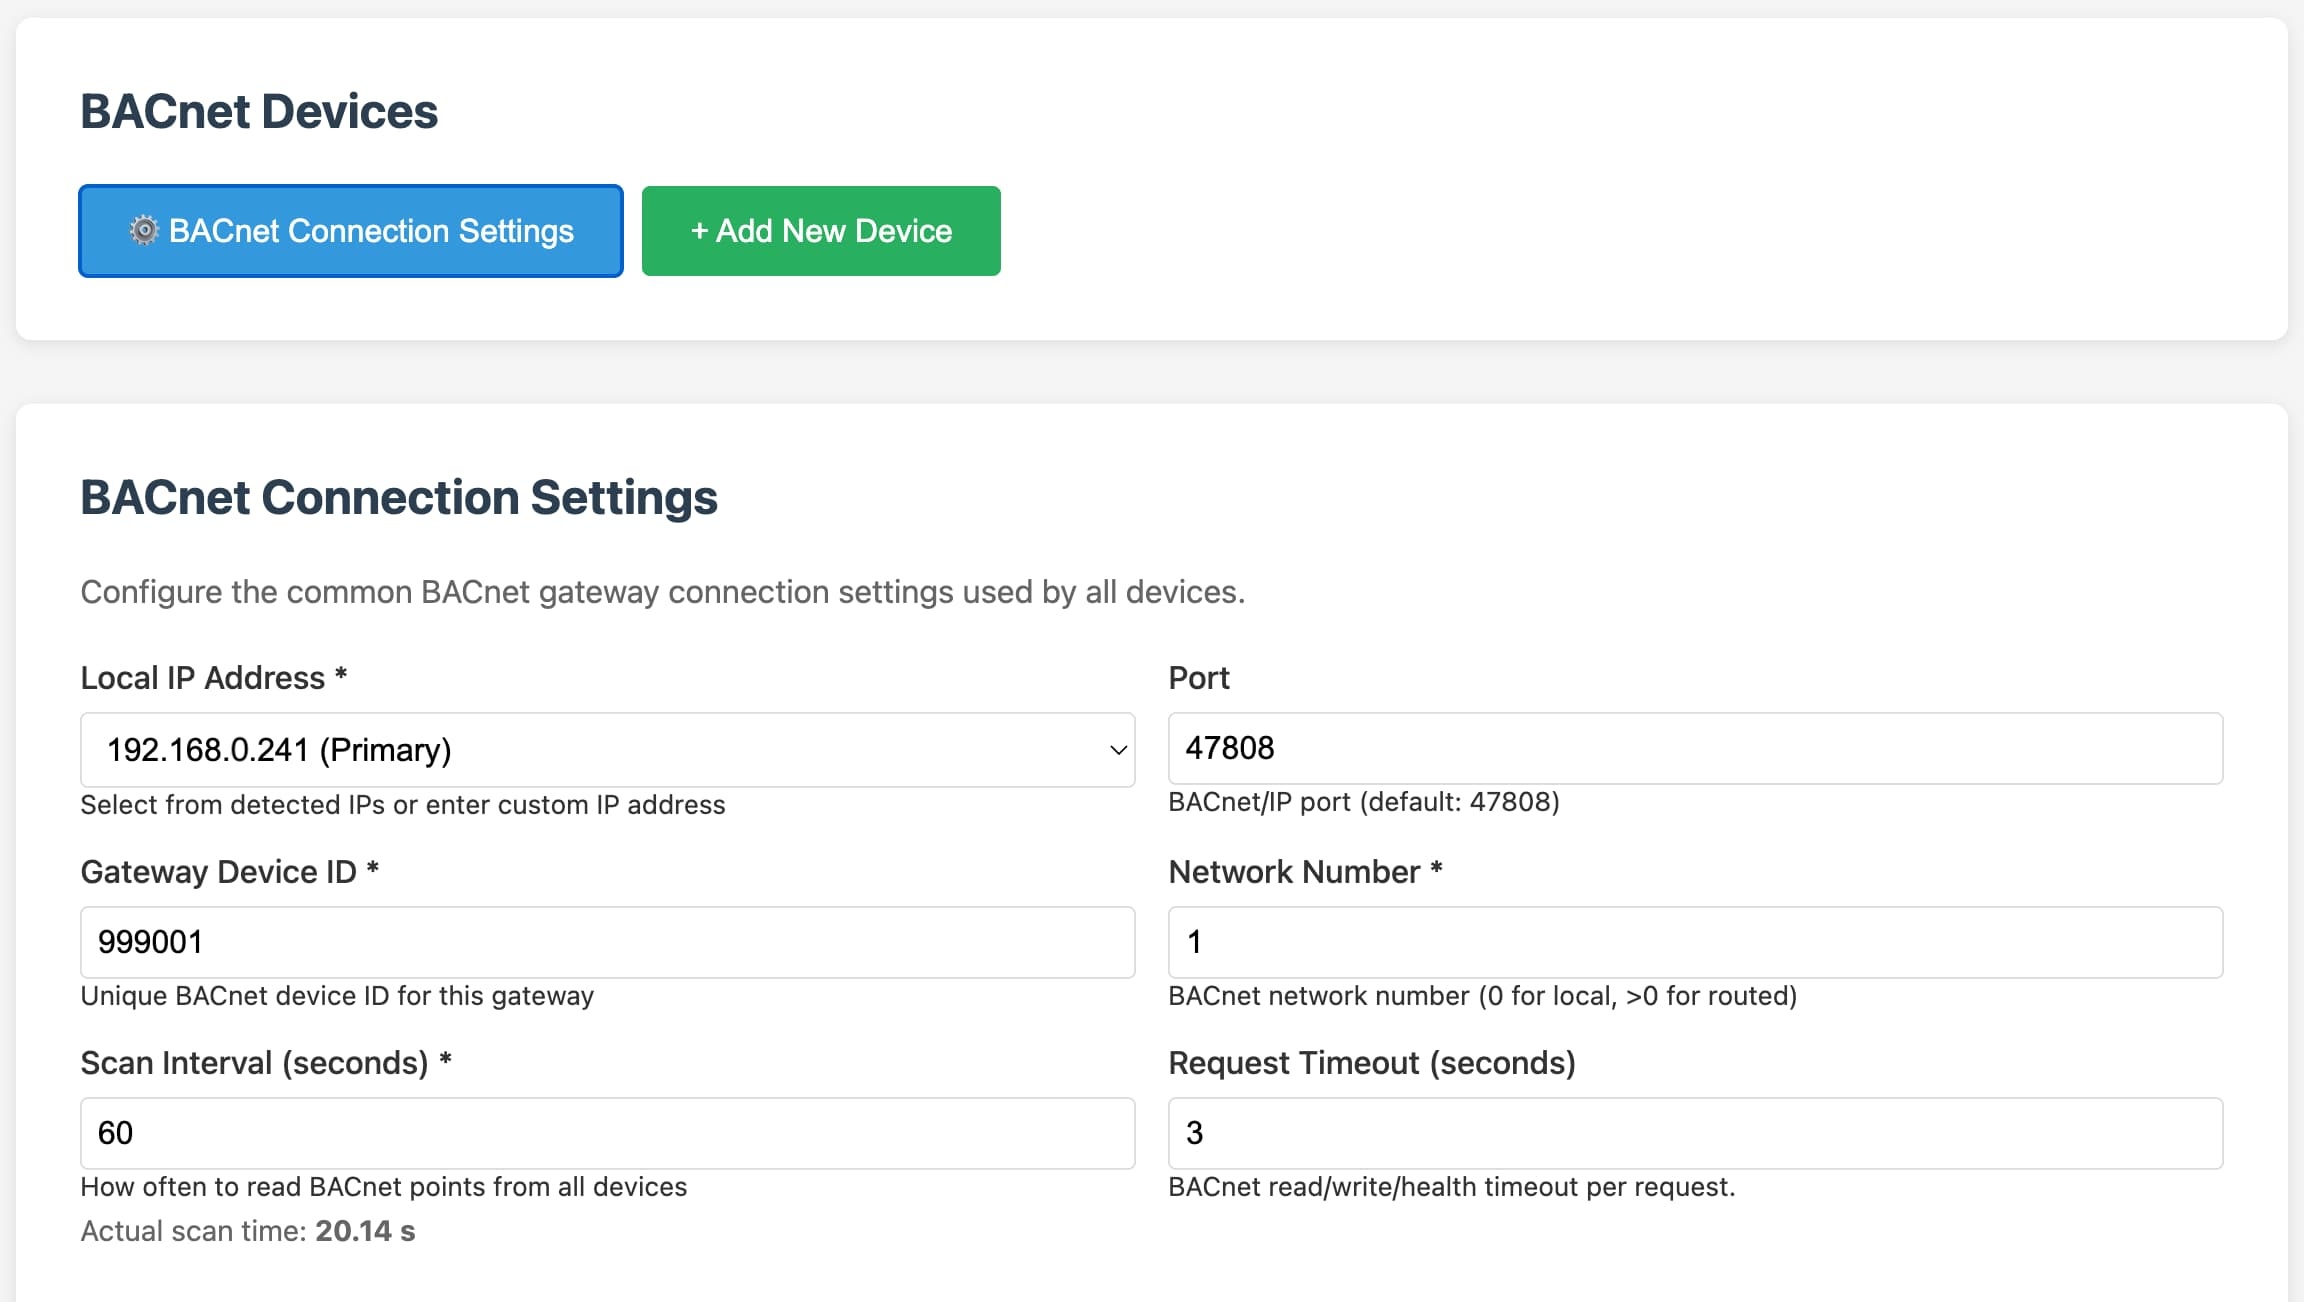
BACnet Connection Settings:
- Gateway Device ID
- BACnet/IP Port (
47808by default) - Local IP Address
- Network Number
- Scan Interval
- Request Timeout
- BBMD settings (only if routed BACnet network requires it)
Use DHCP first to validate connectivity, then switch to static addressing if your deployment requires fixed IP.
Step 3. Discover BACnet devices in Explorer
Open Explorer and run BACnet discovery:
- Select the correct local interface IP
- Start discovery
- Confirm target BACnet devices appear in results

Step 4. Add BACnet devices to the gateway
Open BACnet Devices and add required devices from discovery. Use clear names so they are easy to identify later when mapping points.
Enable online status publishing for operational monitoring in the Diologi app.

Step 5. Add and map points
Use Explorer to browse object points per device, then configure them in Points.
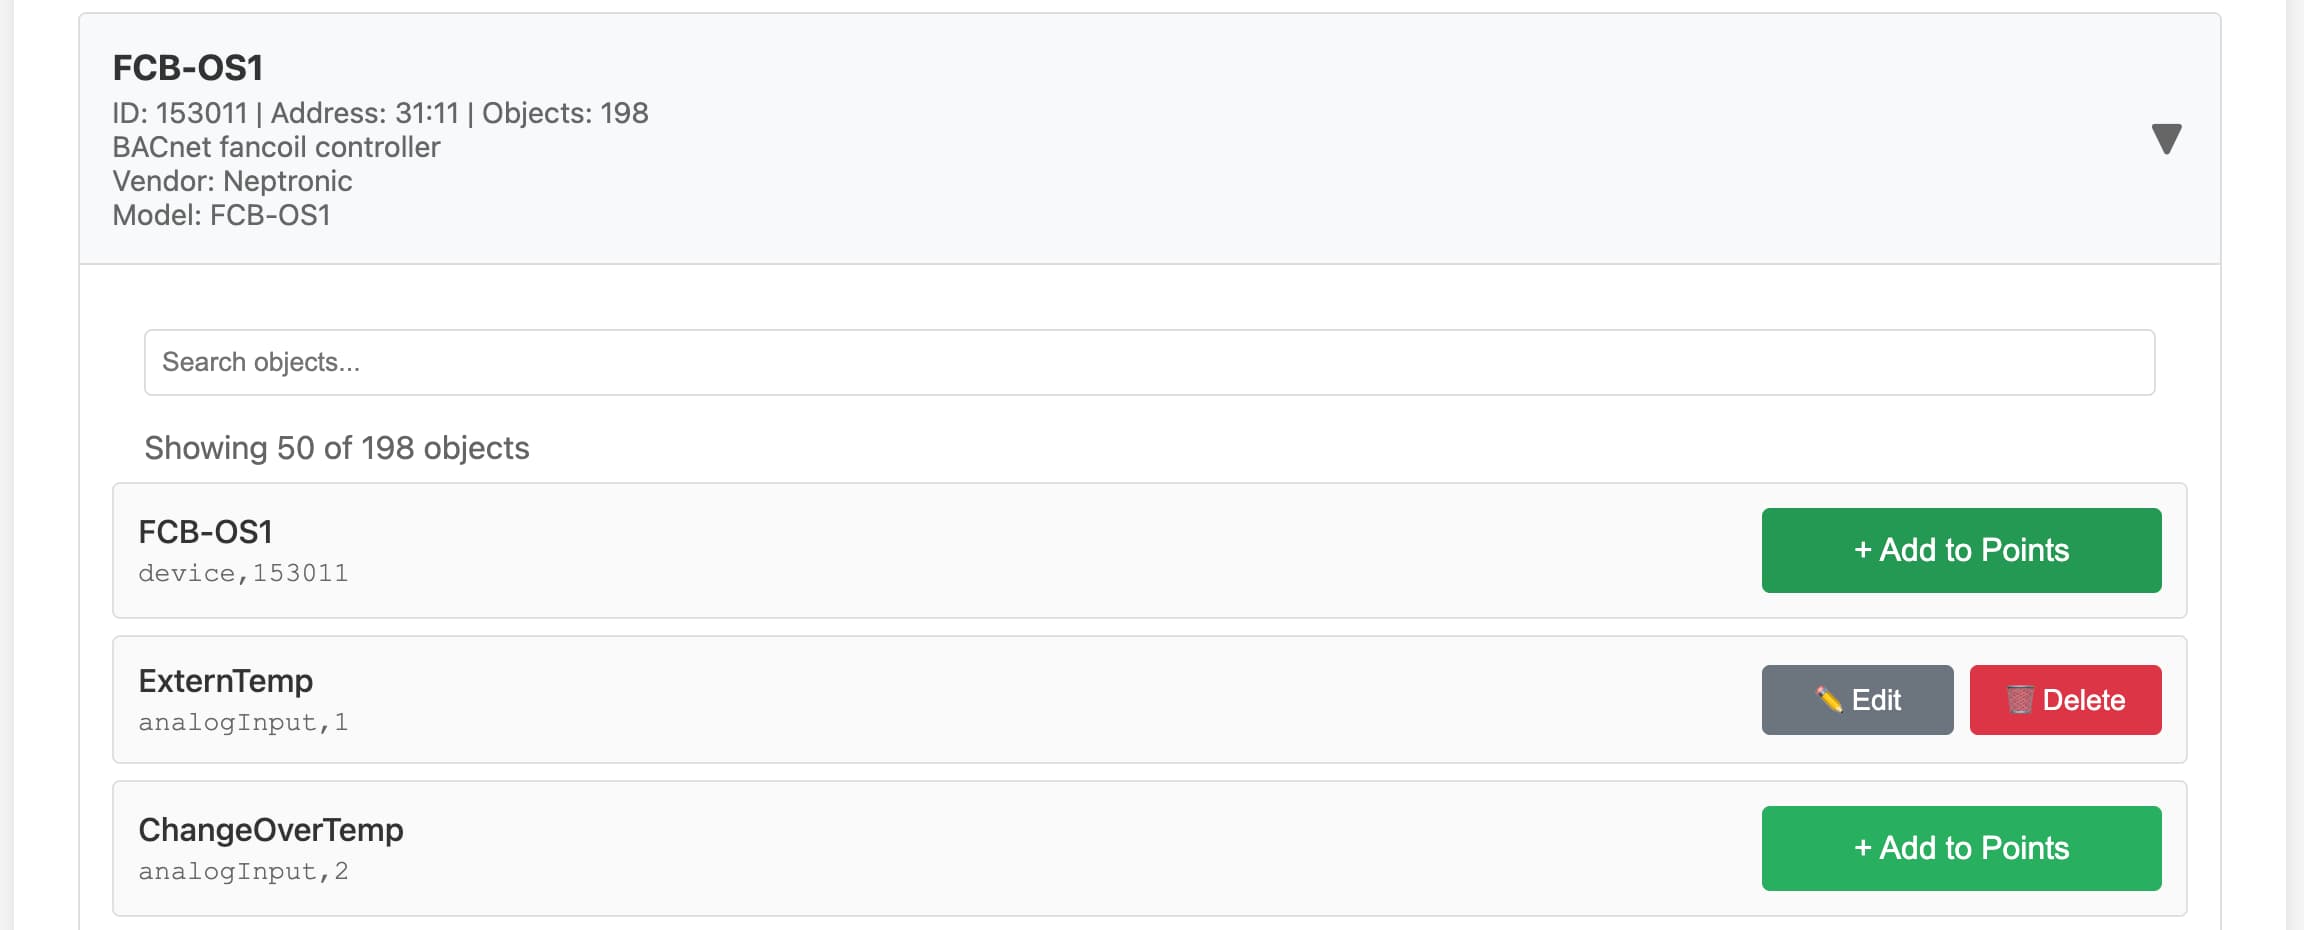
For each point define:
- BACnet device
- Object type and instance
- Property (typically
presentValue) - MQTT topic suffixes
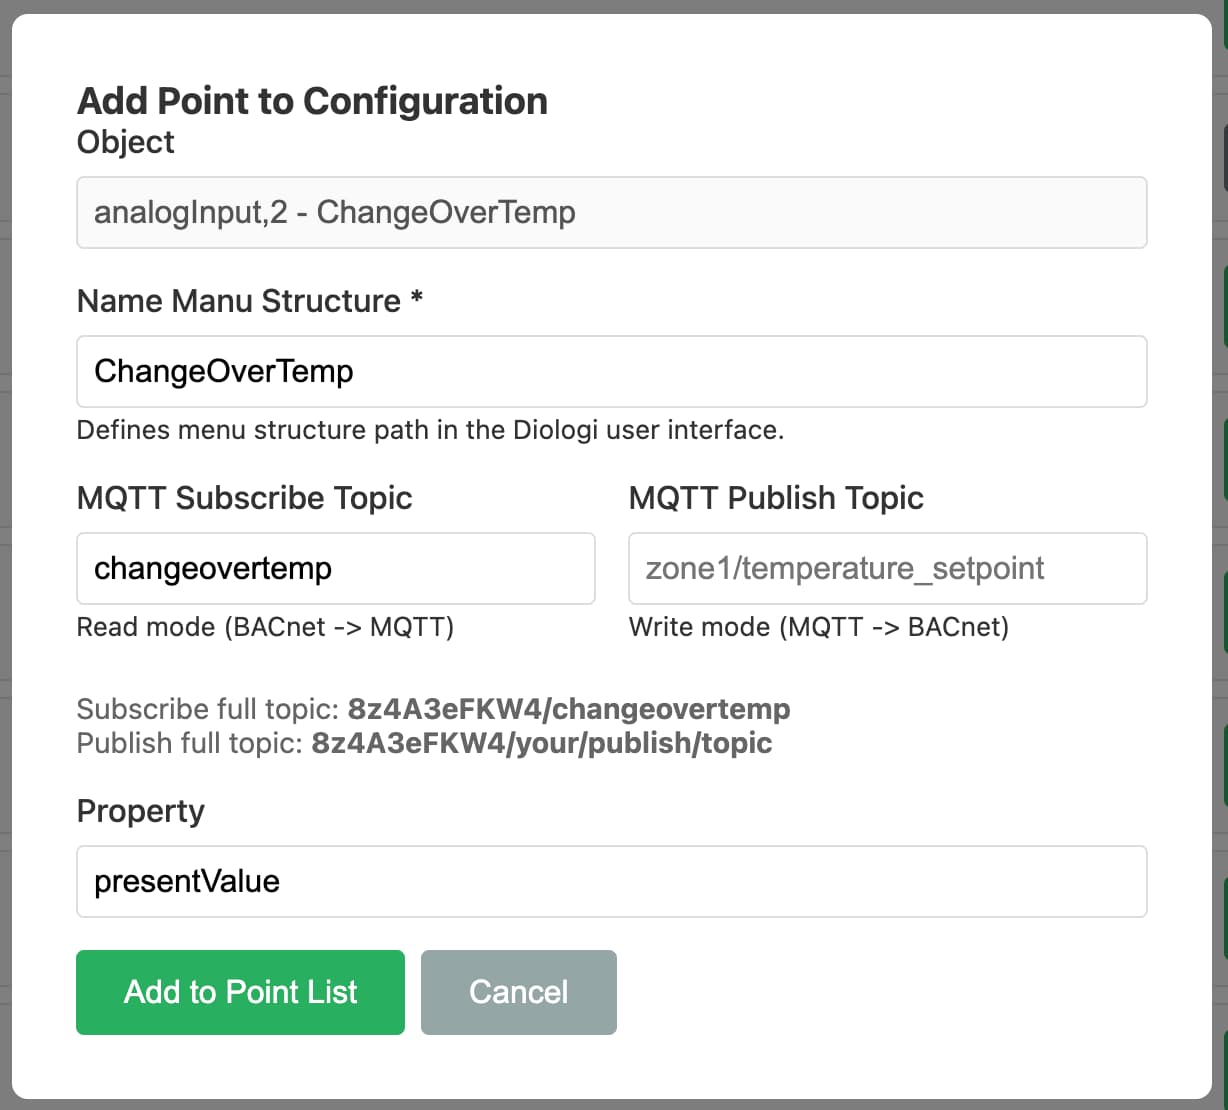
Point behavior:
- Read mode: BACnet -> MQTT
- Write mode: MQTT -> BACnet
If you need both read and write for the same physical BACnet point, add two point entries with separate topics/modes.
For write control points, add a matching read feedback point so command success can be confirmed from the returned value.
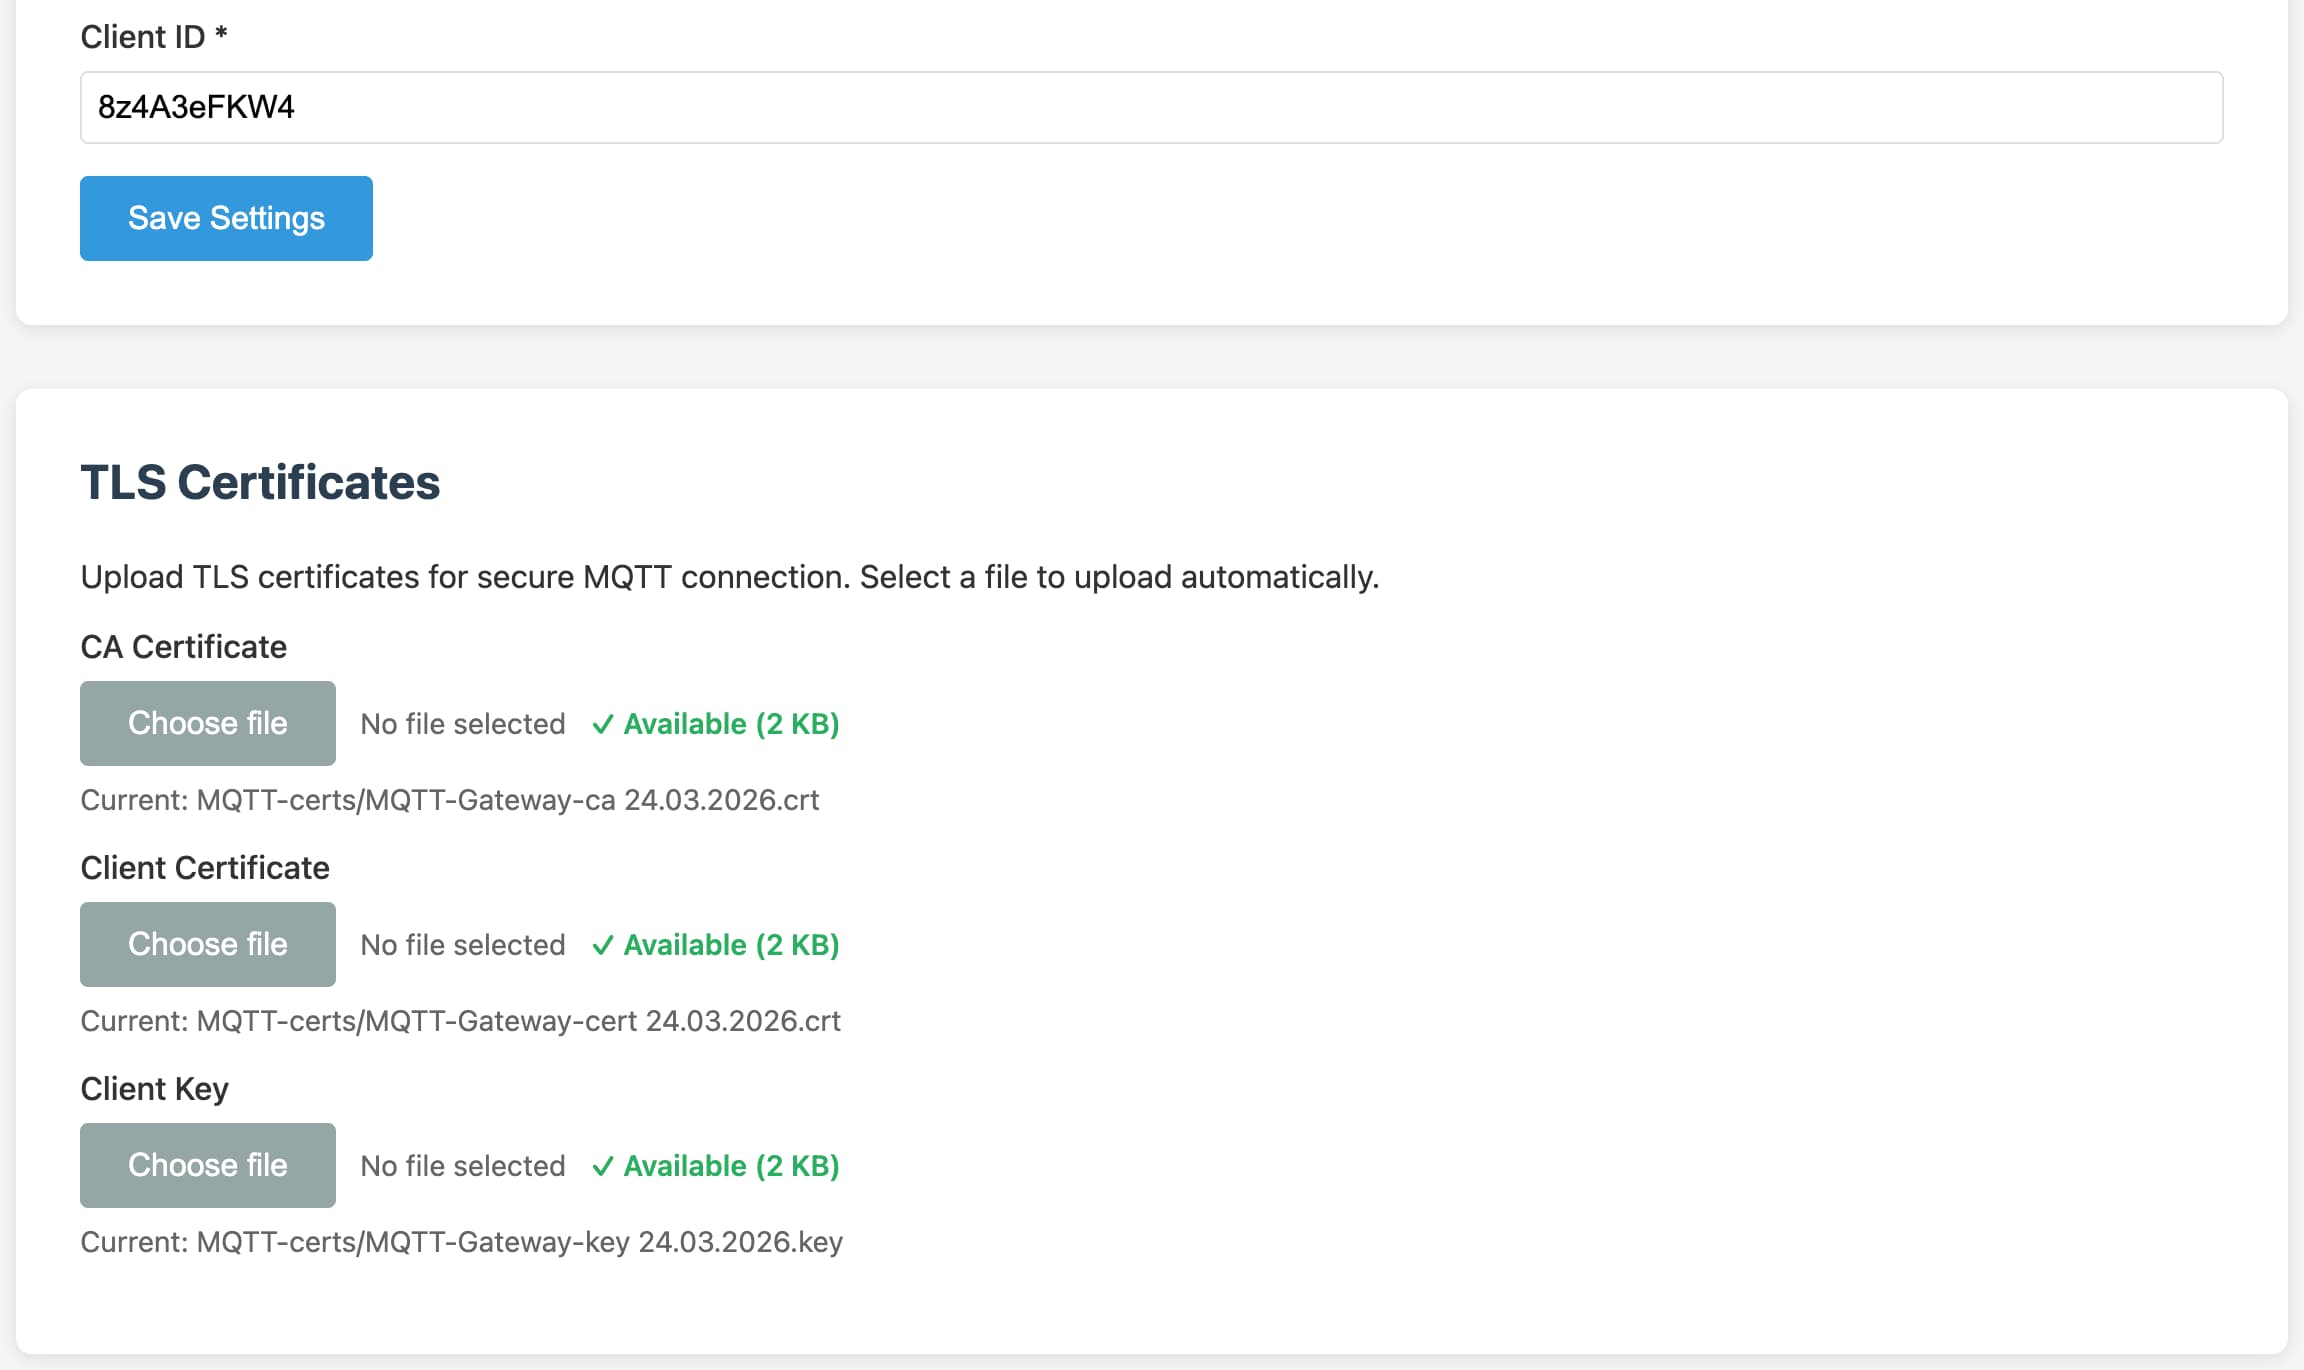
Step 6. Configure MQTT connection to Diologi
Open MQTT Settings and set:
- Host:
mqtt.diologi.com - Port:
8883 - Client ID: your Diologi gateway device ID
- TLS certificates: upload CA, client cert, and private key issued in the Diologi app
The MQTT gateway device in Diologi app is not the same as BACnet field devices configured in the gateway.
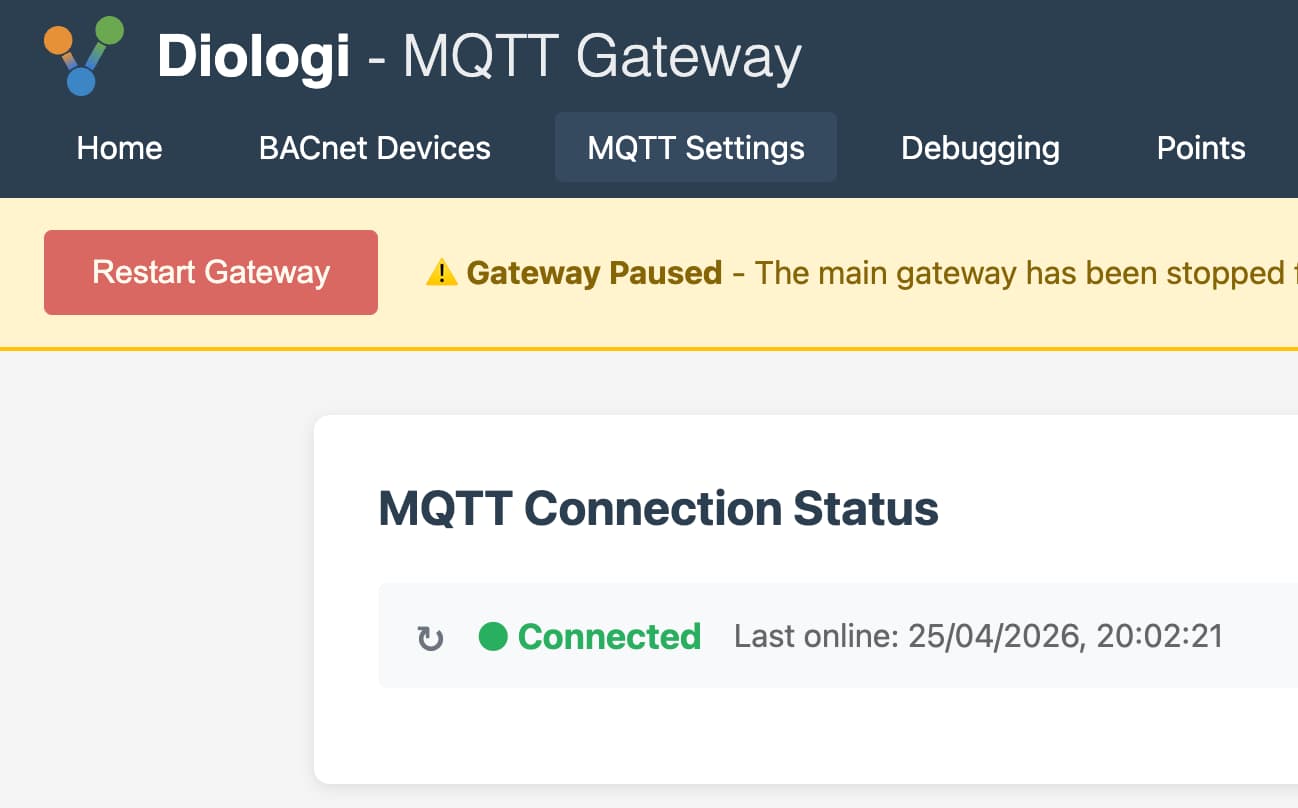
Step 7. Restart gateway and verify operation
After finishing device and point setup:
- Open Settings -> Gateway Control
- Click Restart Gateway
- Verify:
- BACnet gateway status is running
- MQTT connection is connected
- Devices are online
- Point values are updating
MQTT topic pattern
Full MQTT topics are prefixed automatically by the gateway client ID:
{client_id}/{topic_suffix}
Example:
84hdfjks7/ahu1/supply_temp
Quick troubleshooting
If BACnet devices are not found, verify local BACnet interface IP, network routing, BBMD settings, and UDP 47808 availability.
If MQTT stays disconnected, recheck broker host/port, client ID, certificates, and TLS files.